Breakout - High-Low Forwards
This drill was created using HockeyShare.com's Online Drill Drawing & Practice Planning Platform.
Description
D1 and D2 skate below the goal line and to the outside lanes.
D1 leaves 1 second before D2.
C delays to see if D1 or D2 get a pass. If neither are open.
C the skates toward the goalie (either side) to receive a short pass on the side or behind the net.
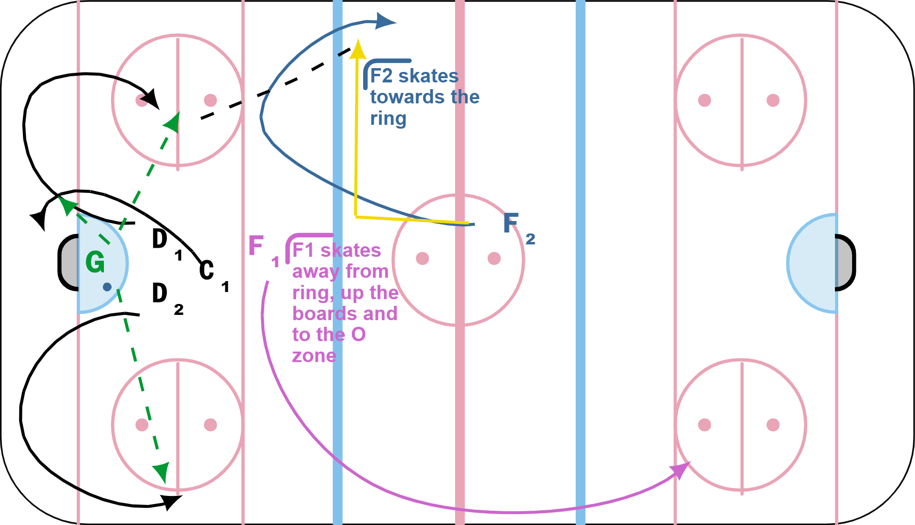
In this diagram, F1 is referred to as the "low forward". F2 is the "high forward".
As the defense or center get the ring in the defensive zone, the forwards start their pattern. The low forward skates away from the ring, up the boards and to the offensive zone.
The high forward skates toward the ring, making a cut to get open, or skating the optional yellow line to be in a good position to receive a pass in the quiet
zone.
The player with the ring could pass to the low forward on the opposite side if the timing allows.
F1 and F2 do not leave on the whistle (if it's a whistled goalie ring).
F1 leaves once the ring has been thrown and skates AWAY from the ring.
F2 leaves once the ring is on our players stick
C1 supports F2
Notes: When practicing - be sure to have a coach with each forward to help them with directions and help with when to leave.
 |