This drill is currently in the trash and scheduled to be deleted soon
Zone Clearance
This drill was created using HockeyShare.com's Online Drill Drawing & Practice Planning Platform.
Description
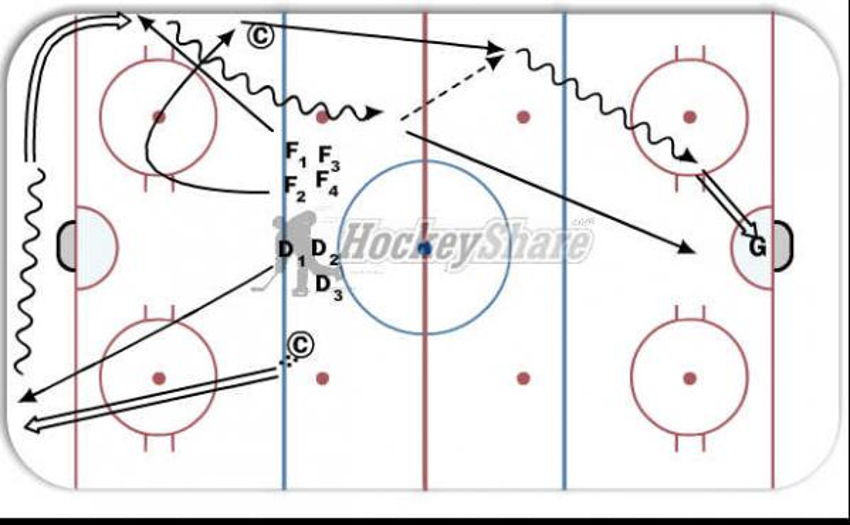
Coach dumps puck in. D1 chases down puck, skates with puck and passes along boards. F1 moves to boards at hash marks or below and receives pass in skates, with skate angled in, so as to keep puck along boards. F2 mirrors defense until pass is made, then gets in front of other team defense. F1 skates with puck around defense, if defense makes the move towards F1, F1 passes to F2. Otherwise, F1 carries puck down on a 2 on 0.
Category: Backchecking
Tags: For teams struggling to clear their end., Center, or F2 doesn't look for outlet pass in the middle of zone, rather they run "interference" on defenseman.
Posted By: tom_palko
(Used in 378 Plans)
Created: 2011-10-05, Last Modified 2013-06-03
 |