breakout practice
This drill was created using HockeyShare.com's Online Drill Drawing & Practice Planning Platform.
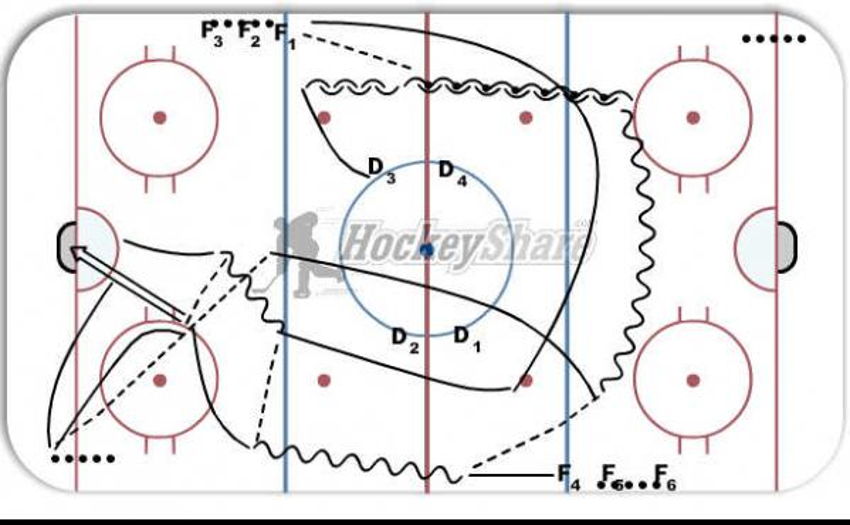
Description
D3 skates to the red dot, pivots and starts skating backwards.
At this point F1 passes to D3 who continues with the puck skating backwards past
the other blueline at which time he pivots and skates forward across the ice.
At this point he passes to either F4, or F1 (who has skated to the other blueline and across.
The 1st time the drill is done, the pass should be to F4, until the players get the feel of the drill. After many repetitions, the pass now is to F1. After again many repetitions, one of the coaches covers either F4 or F1 and D3 has to decide on the fly on who to pass to. F4 and F1 move the puck into the other zone, passing between them until someone takes the shot. D3 follows them to the blueline waiting for a pass from F4. F4 and F1 screen the goalie for a tip in from the point shot from D3. The drill is repeated but not from the other station.
 |