Breakout 5-3, attack 3-2 and reverse 3-2
This drill was created using HockeyShare.com's Online Drill Drawing & Practice Planning Platform.
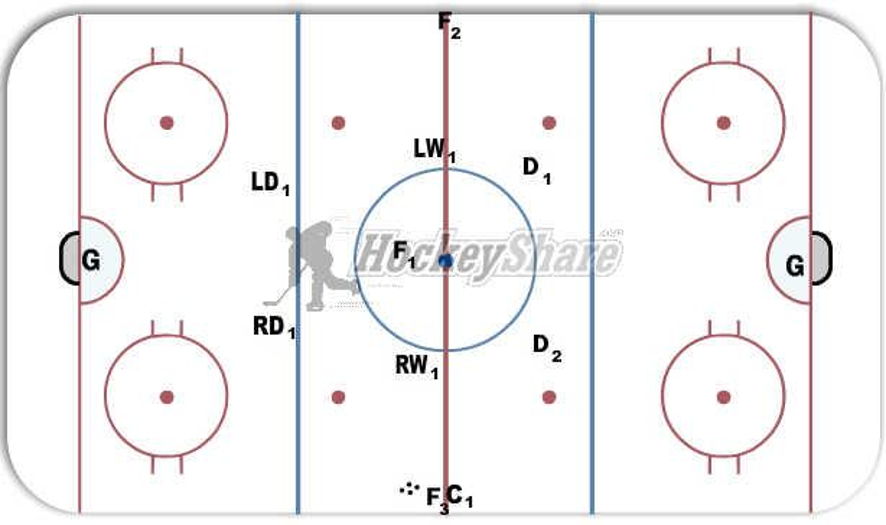
Description
1. C1 rims puck, goalie stops behind net.
2. R/L Ds and C/RW/LW move into D zone for breakout; F1 applies light forecheck pressure. D1/2 move up to blue line, then move back for attack from C/LW/RW. F1 moves up to NZ on backcheck.
3. Line breaks out to go 3-2 vs D1/D2.
4. Once line is past centre going 3-2, C1 moves another puck over to F2, so F1/2/3 go back in 3-2 vs R/L Ds. Battle 3-2 low in each end for a few seconds (ensure F3 is high). On whistle, all players move off ice.
5. Next Forwards and Defense move out into NZ as play is in both ends. Line that broke out 5-3 go to centre, line that went in 3-2 go off, line off now comes out to breakout 5-3. Each F line goes twice in a row (breakout 5-3 and then attack 3-2)
 |