This drill is currently in the trash and scheduled to be deleted soon
Breakout 2 on 2
Description
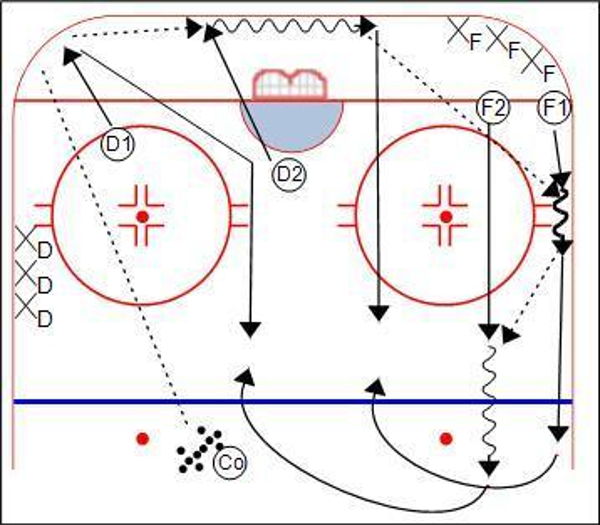
Coach dumps puck into corner.
D1 goes to retrieve puck, D2 supports by going behind net, F1 goes to half board and F2 starts to exit the zone.
D1 passes to D2 and goes to front of net, D2 carries puck behind net and passes to F1. F1 exits the zone with a pass to F1. Both D1 & D2 continue out of zone, F1 & F2 curl in the neutral zone for a 2 on 2 against D1 & D2.
Category: Passing
Tags: -Breakout positioning, -Passing, -Defense to offense conversion
Posted By: sbright15
(Used in 161 Plans)
Created: 2010-02-12, Last Modified 2013-06-03
 |