This drill is currently in the trash and scheduled to be deleted soon
2 on 2 Backcheck
This drill was created using HockeyShare.com's Online Drill Drawing & Practice Planning Platform.
Description
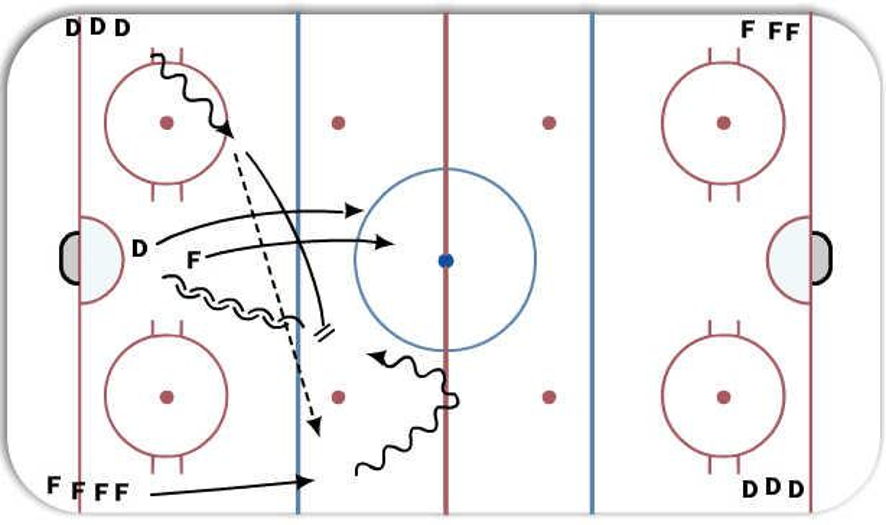
This drill starts in one end with the D making a pass to the F who is moving up the wall. The F takes the puck out to the redline and then comes back on the D on a 1 on 1. Once the 1 on 1 is over the coach blows the whistle and the same thing happens in the other end, but the 1st D jumps into the play while the 1st D back checks making it a 2 on 2.
Category: Backchecking
Tags: Defensive Side, Communication, Hustle Back
Posted By: DirtyWinger29
(Used in 163 Plans)
Created: 2013-03-05, Last Modified 2013-06-03
 |