2 ON 1 Break Out- Re-Group Attack
This drill was created using HockeyShare.com's Online Drill Drawing & Practice Planning Platform.
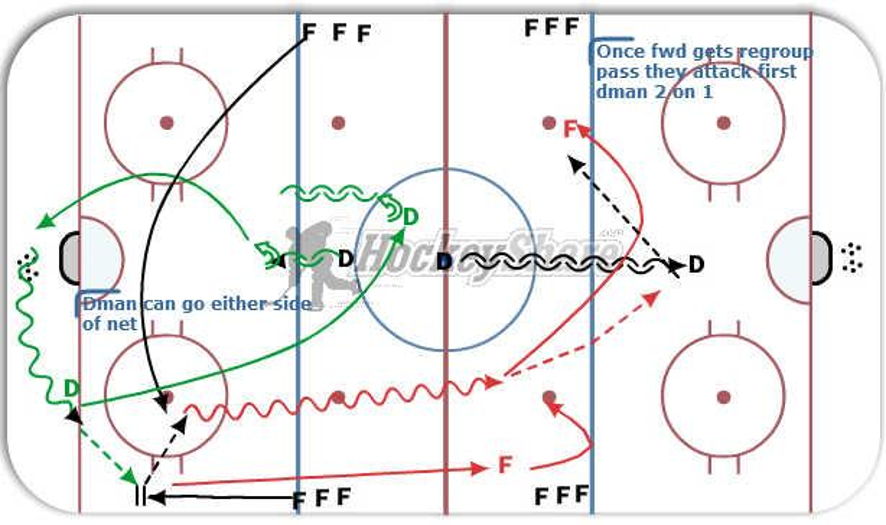
Description
Forwards will be stationed at all four blue lines. To start the drill two D men will be positioned at center one on the bottom of the circle the other on the red line. On the whistle the D man on the bottom of the circle will skate backwards to the blue line once passed the blue line The D man will pivot forward and skate forward behind the net to pick up a puck. Once the D man has pivoted the two forwards will now leave as illustrated (note the D man can go either side so if you are the strong side forward you must anchor on the boards as shown). The D man will pass to the Anchored forward who will then pass to the supporting Forward. The two forwards will then skate to the neutral zone where they will pass to the second defense-man who is skating backwards. Once the second D man receives the pass he will then skate forwards and provide a re group pass to the supporting Forwards who will then attack the first D man 2 on 1. Once the second D Man makes the Re group pass he will continue the drill by completing the sequence of the first Defense man. A new D man will fill in the Neutral zone as the re grouping D Man. This sequence will continue for the remainder of the drill.
 |