Offensive Zone -- 2-1-2 Switch
This drill was created using HockeyShare.com's Online Drill Drawing & Practice Planning Platform.
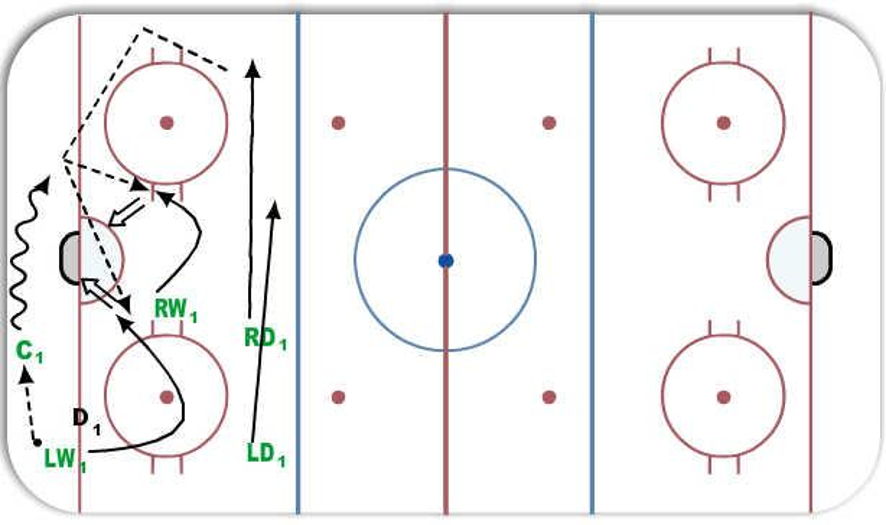
Description
Forming the triangle down low, LW makes pass to C1. LW1 breaks to net looking for return pass.
However, C1 stick handles puck around net. RW1 shifts to strong side looking for pass, LW continues to break to weak side looking for a return pass or rebound and LD and RD shift to other side of Offensive Zone.
C1 has 3 options: Pass to RW1 who shifted over to strong side, pass off the boards to RD1 at the point or look for LW1 on the weak side.
Notes: Important to teach second forward, in this example C1, in the offensive to hold on to puck if he/she is not being pressured by opposing player.
In other words, do not waste a great opportunity by simply sending the puck in front of the net and hope something good happens. Wait for the play to develop and everyone on the offensive side gets into position.
 |