Eagles 2 on 1
This drill was created using HockeyShare.com's Online Drill Drawing & Practice Planning Platform.
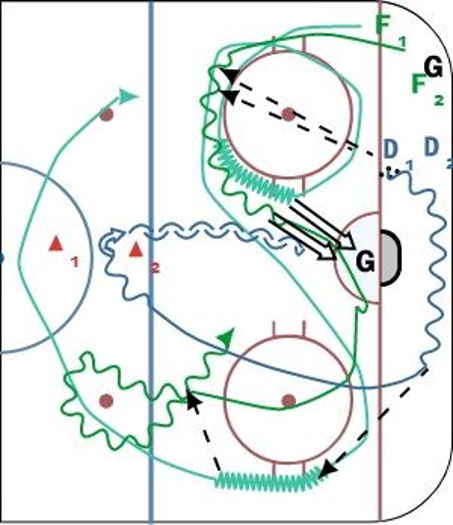
Description
F1 skates around top of circle calling for a pass from D1, he continues to skate with puck and shoots from above the hash mark. Once shot is complete, F1 continues around the circle, and at the same time as the shot is taken, F2 starts along same pattern, and receives pass from D1 at top of circle and skates in for a shot, and follows for rebound. F1 continues through the slot and comes down low around the opposite circle and receives a breakout pass from D1. F2 comes down in support and the 2 F's clear the zone and go around pylon at centre ice and regroup for a 2 on 1. Meanwhile, after D1 makes quick up pass, he heads to neutral zone, transitions around pylon just above blue line and defends the 2 on 1.
 |