1-2-3 Regroup
Description
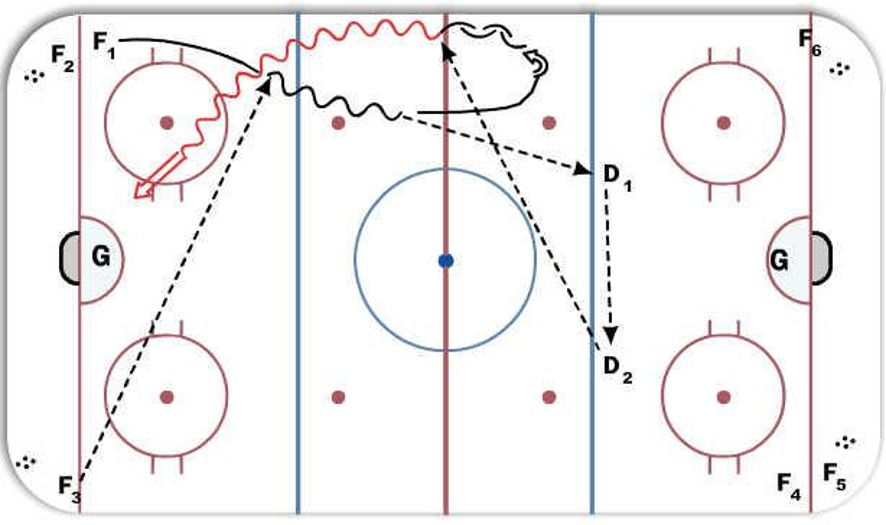
Sequence 1:
F1 (Centre) takes puck out of zone and passes down to either D1 or D2.
D to D pass, then back to F1 who goes in for a 1v0 shot on net.
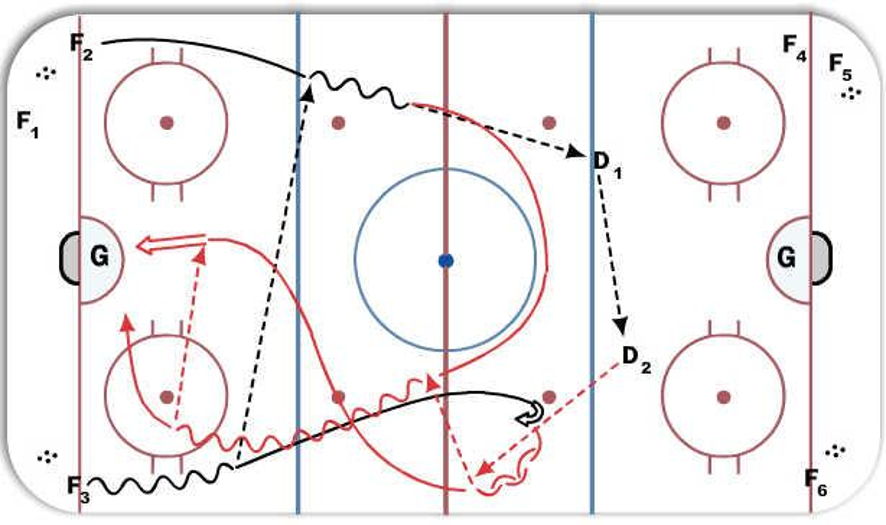
Sequence 2:
F2 and F3 come out of corners, make cross ice pass, and then pass down to either D1 or D2
D to D pass, then back to which F has anchored on the wall. Other F comes across ice in support. F on the wall passes to F cutting through centre lane and they attach 2v0.
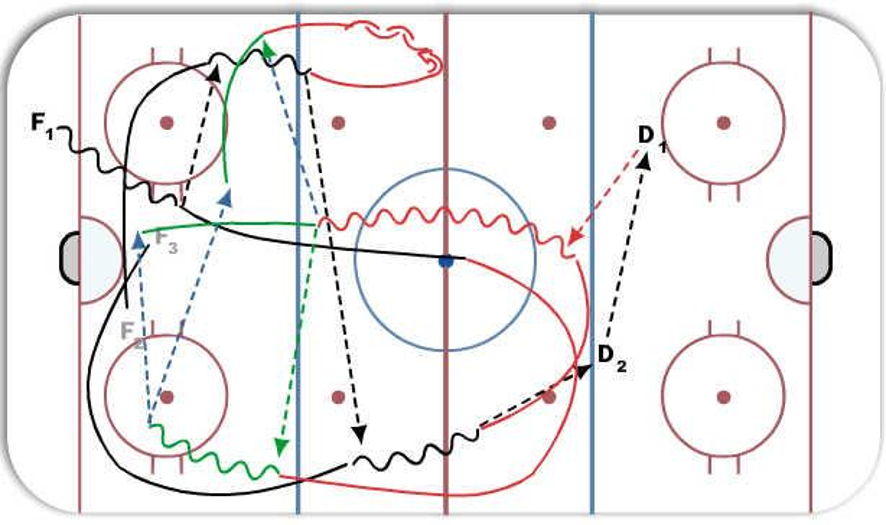
Sequence 3:
F2 and F3 spin out after they attack the net to get into their respective wings and the F1 (centre) carries puck out.
F1 passes to either F2 or F3, and then F2/F3 make cross ice pass... then pass down to the D.
F1 (centre) swings to the side of the first D to get the puck. The F switches lanes F1 and gets the pass from D after the D to D pass. Then F1, F2 and F3 attack zone 3v0.
F coming up the mid-lane should bump the puck to either side and then drive the net.
After F1, F2, F3, D1, D2 finish this sequence it starts over from opposite end with new line.
Notes: 1v0, 2v0, 3v0 with regroup passes in NZ
Repeats from Opposite end with new line and new set of D.
 |