Laker NZ Transition
This drill was created using HockeyShare.com's Online Drill Drawing & Practice Planning Platform.
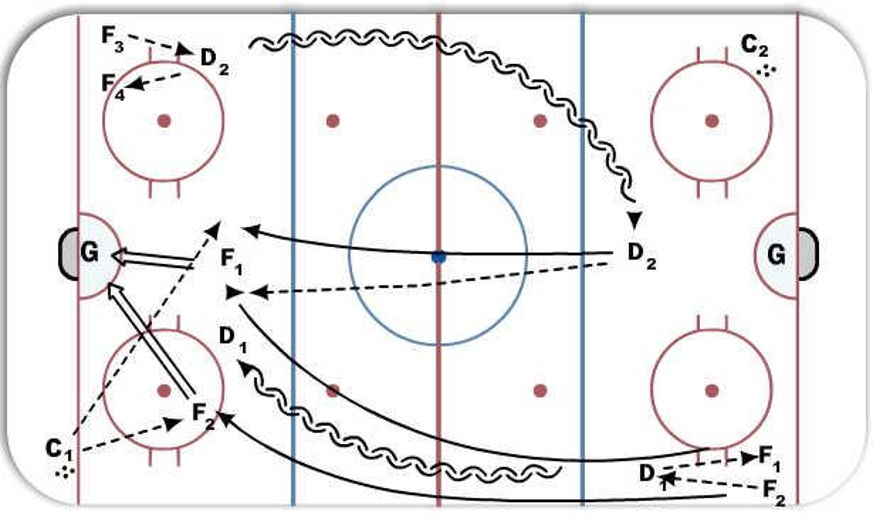
Description
Two lines of forwards are positioned in opposite diagonal corners. The defensemen are positioned inside the same opposite diagonal bluelines. The first forward along the boards F1 Starts with a puck and touch passes it with the defenseman that starts between the hash marks and the blueline to far blueline, the forward continues down the ice to receive a pass from the coach for a shot on goal and then stay's in front of the net. The defenseman then passes the puck to the second forward from the opposite diagonal corner breaking thru the neutral zone for a second shot on goal. Defenseman jumps up to the offensive blueline for a pass from the coach for the third shot on goal with both forwards positioned in front of the net for tips and screens.
 |