This drill is currently in the trash and scheduled to be deleted soon
Transition Counter Attack Nuetral Zone
This drill was created using HockeyShare.com's Online Drill Drawing & Practice Planning Platform.
Description
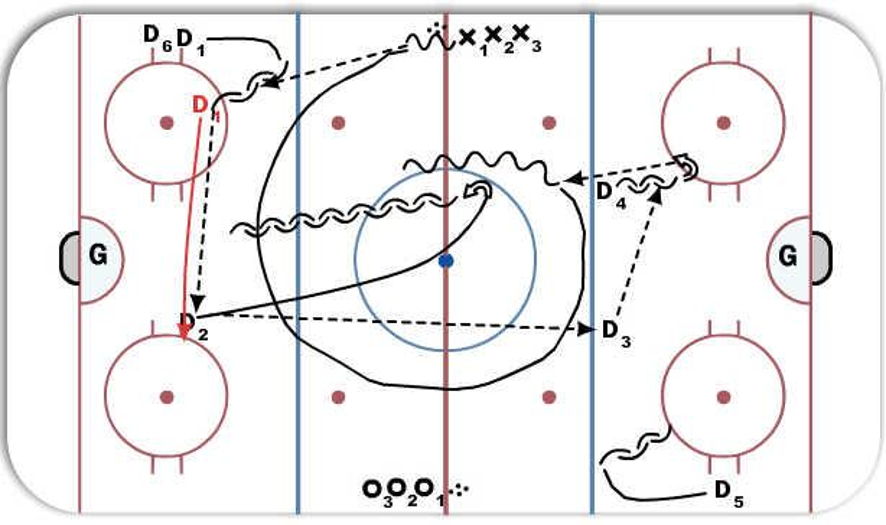
Drill starts with D1 receiving puck from X1, D1 then passes to D2
X1 follows in support, and follows puck to other side to regroup up ice to attack one on one with D2.
D2 passes to D3, D3 passes to D4, then D4 regroups with X1 who skates back up ice with puck for a one on one situation with D2.
(After D2 makes pass he needs to jump up and work on his gap control against F1.)
D1 takes D2 position, the drill continues from far end with D5 receiving the pass and passes to D3 who replaces D4, D4 goes to wall for next time. D6 has joined D1 in their end for drill so D3 has someone to pass too.
Category: Transition
Posted By: Beavy
(Used in 2 Plans)
Created: 2013-07-13, Last Modified 2013-07-15
 |