1 Touch D Stretch
This drill was created using HockeyShare.com's Online Drill Drawing & Practice Planning Platform.
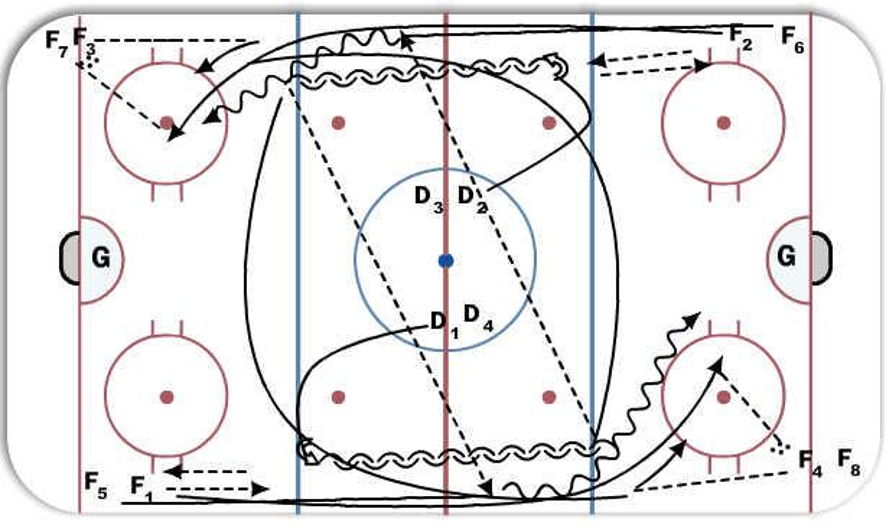
Description
F1 and D1 are 1 touch passing all the way to far blue (D starts at inside centre ice circle and pivots around dot). F1 leaves D1 at blue and goes in gets a pass from coach/player and hangs for rebound and or screen for next 2 shots. D1 who is left with puck at far blue looks wide for F6 flying thru neutral and delivers are good cross ice stretch pass. F5 is doing the same thing on other side and getting pass from D2. These two F's become the 2nd shooter at opposite ends. The last shot comes from the D1 and D2 who after making the stretch pass wide jump up in the play and gain position inside Off. blue line and take a pass from coach/player in corner while F are battling front. Because we have moved to 4 corners instead of two then have the same side line make the passes from corners. Forwards switch lines each time. D switch which side you come out of as well each time.
Notes: Good passes always a key but good timing by 2nd forward fleeing the zone so pass is received in full flight staying on side. Try to make pass and receive pass in good time so that F gets it at redline or just inside to avoid a D in a game just stepping on blue to intercept.
 |