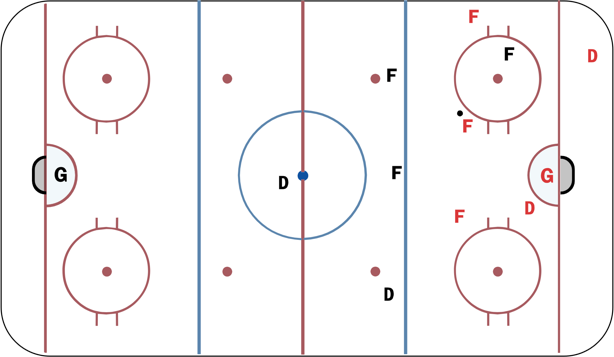
1-3-1 Defensive Trap
Description
1F on the forecheck (if he gains possession, F2 and F3 need to move into the zone for support.
2F/1D hang back at the blue line. Form a defensive wall to create the turnover between the blue and red line, so we can dump it back in the zone without icing.
1D falls back to create support to the wall in front of him and ensure no one gets behind him.