Offensive Zone - Free Ring
Description
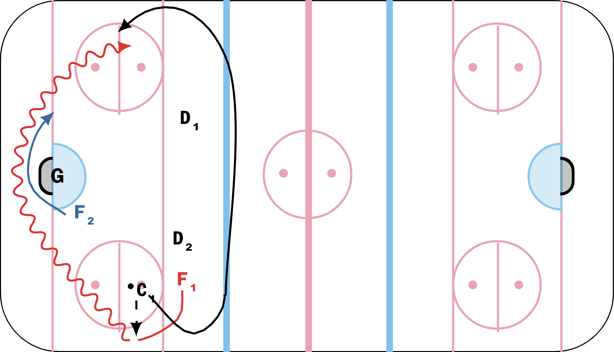
On the free ring
- C1 takes the ring and makes a short pass to F1. Leaves the zone for and times
their re-entry for a drop pass on the far side from F1
- F1 is lined up outside the ringette line, skates to the boards and receives a pass
from C1
- F2 is lined up in front of the goalie and becomes the trailer for F1. Times leaving
their position to get into position for a back pass from F1
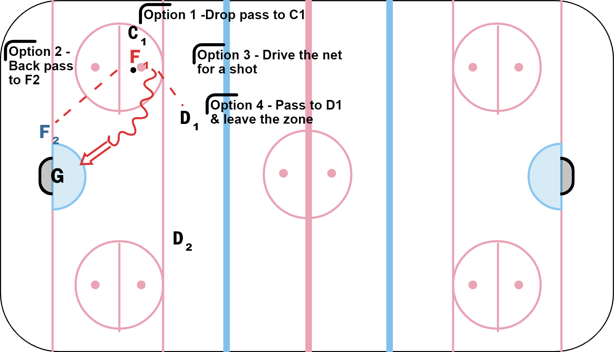
F1 skates to the opposite circle
- Option 1 is a drop pass to C1
- Option 2 is a back pass to F2
- Option 3 is a drive to the net for a shot (if you've created the space)
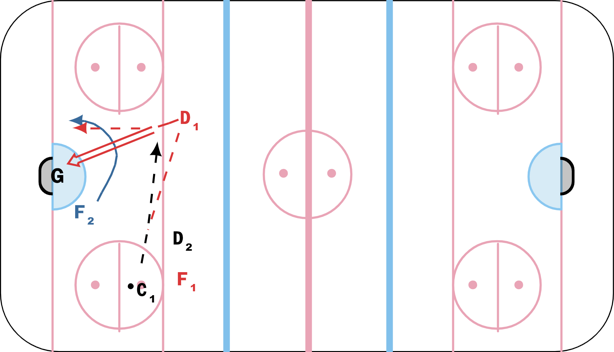
- Option 4 is a pass to flat pass to D1 as you leave the zone