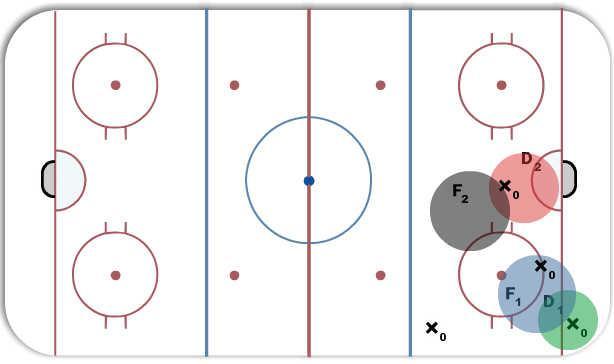
D Zone 1 on 1, 2 on 2, 3 on 3.
Description
D men cover 1 on 1, 2 on 2, 3 on 3.
Tags:
Good D positioning