Break Out / 3 - 2 Regroup
Description
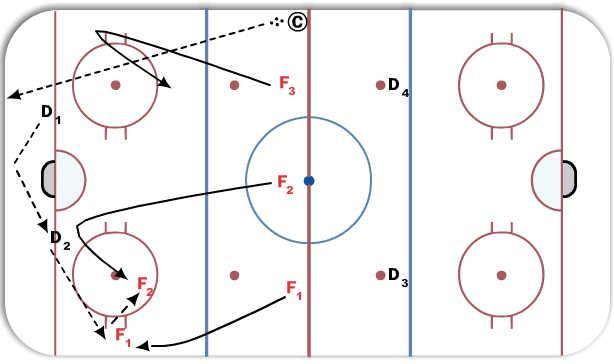
1. Break out
- D1 + D2: Coach dumps in puck D1 D2 start on the blue line skating into d-zone and D to D pass with break out to F1.
- F1 skates hard to hash mark and holds the board. Chips or passed puck to F2
- F2 supports down low with a curl on strong side of the puck
- F3 Curls weak side low near hash marks, times it to break weak side up ice.
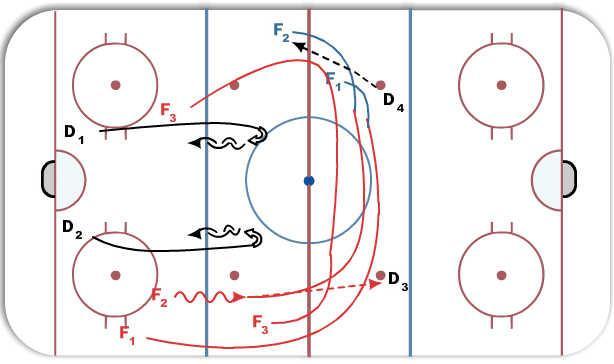
2. Neutral Zone
- F2 makes pass to D3
- D3 passed to D4 (always)
- F1 and F2 follow their pass and curl to the strong side of the puck.(N Zone Tactics - Always curl 2 to strong side)
- F3 times his curls as he will be the high man on zone entry (ie: do not be on weak side of the puck infront of F1 F2)
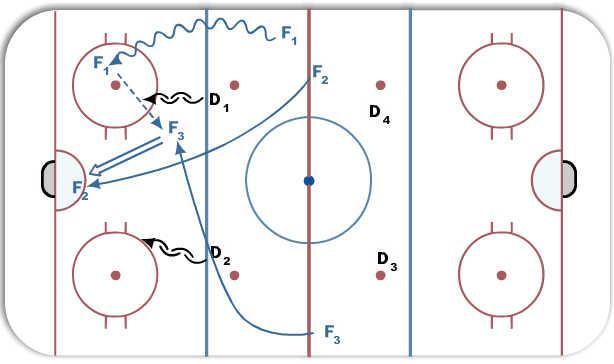
3. Zone Entry:
- Mid Lane drive!
- D4 passes to F1.
- F2 Drives the mid line (splits the D) goes hard to the post (stays onside)
- F1 stays wide with the puck (options: drive hard shoot, drive hard pass to F2, slow up or drive hard and high pass to f3)
- F3 "buys ice" by staying on side and walking the blue line. Ends up high guy to support F1 for high slot pass / drop pass. Shoots
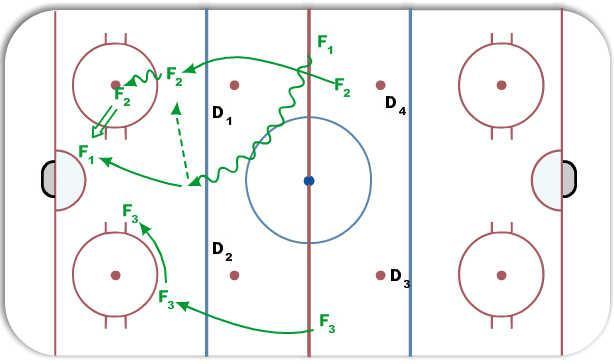
Mid Puck Drive!
- F1 takes pass from D4 and drives the mid line with the puck!
- F2 and F3 go hard wide supporting F1.
- F1 can dish to either F3 or F1 and drives the net for a screen. (or shoots if the option is given)
- F2 or F3, whoever gets the puck drives wide and shoots or passes to F2 or F3 in the high slot.
- F2 or F3 (whoever doesn't get the puck) supports high slot.
Tags: 1. D Zone - Fast Break out, 2. N Zone - 2 players swing strong puck side, 3. Offensive Zone Entry Tactics