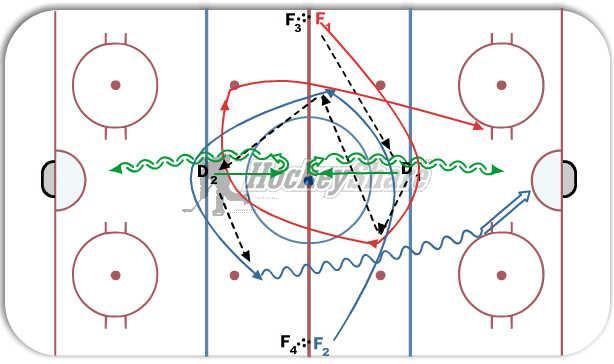
2-1 Neutral Zone
Description
F1 - Starts drill, makes pass to D1 and swings underneath him.
F2 - Swings above D1.
D1 - Receives pass from F1, passes to either forward as they turn up ice, then closes gap.
F1/F2 - Receive pass from D1, one pass made in neutral zone to other forward, and then pass made to D2. Whoever made the pass swings underneath D2, other forward swings above.
D2 - Receives pass from forward then passes to either forward as they swing back up ice.
F1/F2 - attack D1 2 on 1.
Drill then starts with F3, F4, and D2 heading the opposite direction.
*can add the D-man making the pass and then skating to center red and transitioning back into defensive position or leave him stationary.