neutral zone pressure
Description
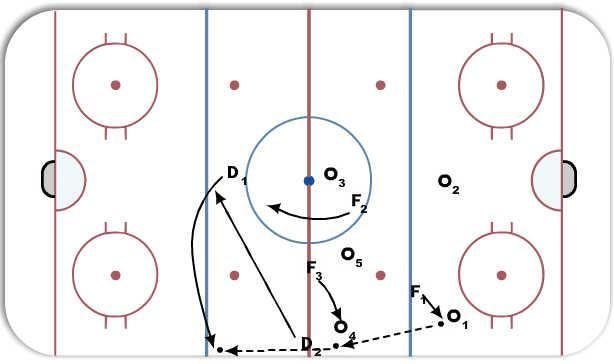
diagram 1
D2 is pressuring the puck carrier at the red line to force an icing or chip off the boards, D2 must maintain body position on puck carrier even after they get rid of the puck so their partner has more time to retrieve puck
D1 is dropping back to retrieve the puck and start the regroup
D2 moves towards the middle of the ice after releasing their check and moves into position for regroup
Forwards need to be backchecking hard!
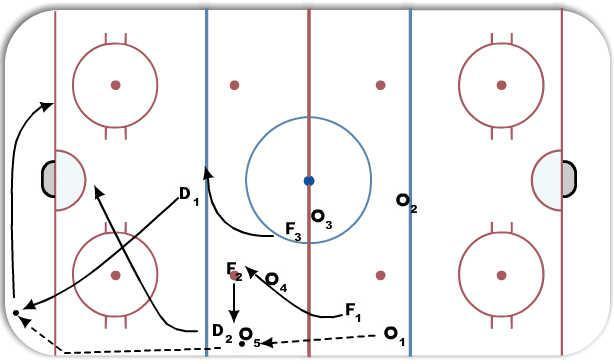
diagram 2
D2 forces the puck carrier to dump in or offside at our blue line
D2 must maintain body position on puck carrier even after they get rid of the puck so their partner has more time to retrieve puck
D1 retrieves puck and skates around net to start breakout
D2 skates to the front of net
Forwards move into break out positions
Tags: maintain body position, forwards have to backcheck hard