Forward to Defence and Back
Description
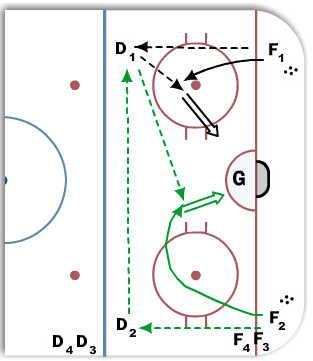
Position players and pucks as illustrated.
F1 passes to D1. F1 circles face off dot and receives pass from D1. F1 shoots on the net.
F2 passes to D2. D2 passes to D1. F2 circles face off dot and receives pass from D1. F2 shoots on the net.
On the next execution, F2 takes F1 position. F3 takes F2 position. D2 takes D1 position. D3 takes D2 position. F1 and D1 return to back of respective lines.

