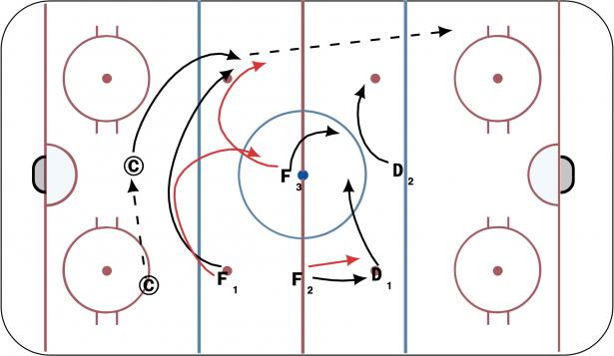
Peg Retrievals
Description
1st NZ in Black with Retrieval (2nd Diagram)
Coach pass D to D F1 track. F2 and F3 hold. D gap up. Coach chips puck into zone. D1 on retrieval. F3 calls BUMP NET. F2 push up and come back to puck. F1 slash across pushing above puck.
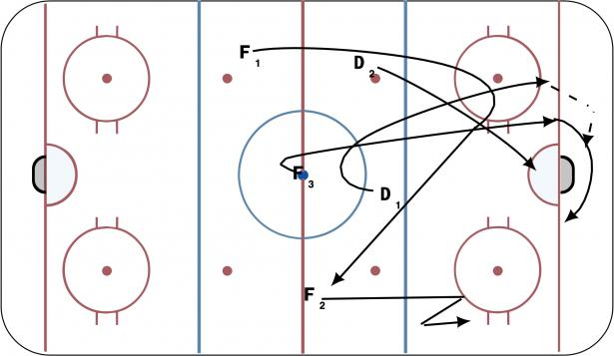
2nd NZ in RED with Retrieval (3rd Diagram)
Coach pass D to D. F1 through middle, F3 track. Puck gets chipped into zone. D1 on retrieval. F1 call BUMP WALL. F3 push up, F2 slash through middle getting above puck.
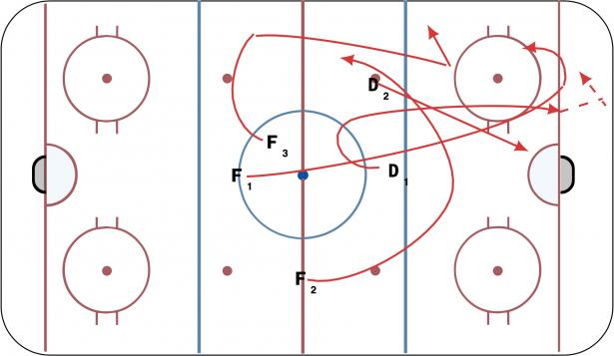
3rd NZ with retrieval (4th Diagram)
F2 on retrieval. F1 tracking through middle and becomes center support. F3 slash above puck into NZ. D1 below puck, D2 back into zone even with F1, looking to jump into play