Supporting D partner - progression
Description
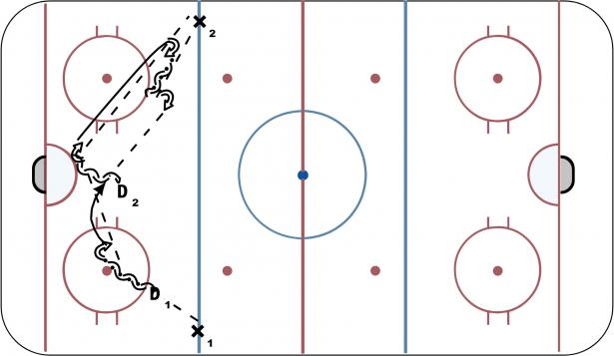
No pressure: X1 starts drill by sending puck to D1. D1 moves backwards with puck and pivots to send puck to D2. D2 should be 'underneath' D1 for support and in the middle of the ice. D2 receives pass and moves up ice to pass to X2. D1 then slides 'under' D2 in the middle of the ice to be there for support. X2 gives puck back to D2 who skates backwards for 2-3 strides and finds D1 for pass again. Drill continues for 3-4 reps through.
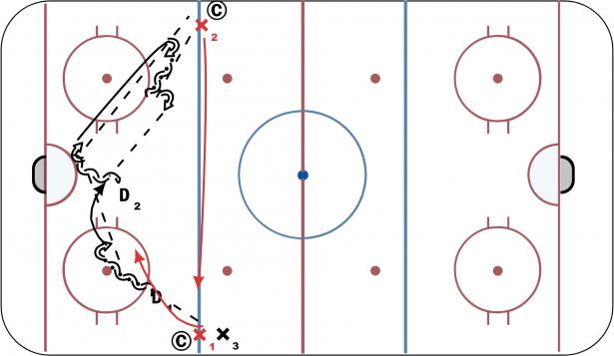
With pressure (diagram 2): Repeat drill as above but now X's attack. (C) tells X's who to attack. If X1 attacks D1 then D1 moves puck to D2 who finds outlet pass (X2) up the wall. If X (as seen in this diagram X2) sprints across the ice after giving puck back to D2 - then D2 finds D1 for support 'under' and instead of sending puck up the boards to X1 - they must now adjust, and send puck back to D2 who's regrouped 'under' D1 and send puck back to X2's side. They would have just completed a hinge in terms of systems.
Tags: Communicate, See what's in front of you, Read the play - don't predetermine, Find the safe outlet - even going back to D partner is good!