2 on 0 Plus D Point Shot - Flow
Description
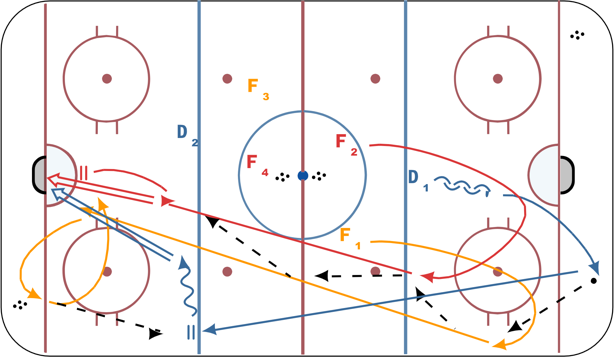
Coach dumps puck in corner.
D skates backwards and then pivots to retrieve puck in corner.
F1 skates into zone and does open pivot to receive outlet pass from D1 around hash marks on boards.
F2 enters zone down the middle and then curls to provide puck support for F1. (should be around face off dot for spacing)
F1 passes to F2 and the two proceed up ice making a couple of passes through neutral zone.
F2 should receive puck around blue line and then shoot from ringette line.
F1 crashes net for rebound.
After outlet pass, D1 skates hard to far blue line.
Following shot, F2 goes to front of net for screen.
F1 goes corner to retrieve a puck and then pass to point.
Following pass to point, F1 goes to net for screen/rebound.
D1 receives pass and then walks the line before shooting on net.
Notes: Progression: After F1 passes to D1, have F1 skate out to pressure D1 as if D zone winger. D1 forced to create shot lane. F2 screens goalie.