PK Forcheck (one man down)
Description
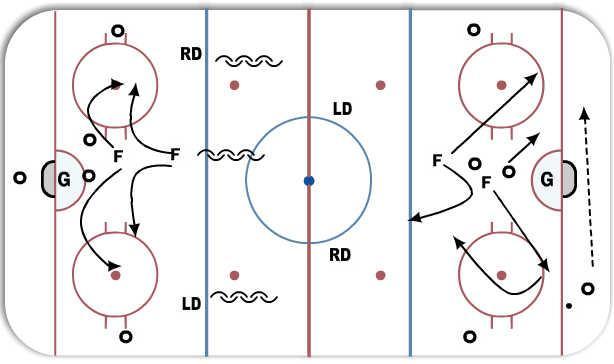
Scenario 1 they set up behind the net. Here F1 forces with pressure but no all the way and stays in front of the net but never coming to a complete stop (keep feet moving) while F2 stays high just inside blue but between our D (reacts off F1's first move depending on where they move the puck).
Notes: In 2nd scenario the puck ends up in the corner after we dump and our two forwards are in their zone fast. Here we want F1 to engage the D and apply pressure without necessarily going below goal line. Unless they see that the D is struggling (backs and bobbles) then engage and win battle and kill clock by ragging puck low in their end. D on blue line ready to backup to avoid a stretch pass to one of their wingers. Important for F1 and F2 to always come back to the middle of the ice after they pressure. Some times they will trade off on who's pressuring but the one who isn't always ends up back between the D clogging up the middle. If they gain neutral zone then two forwards always come back thru the middle to intercept passes.
Tags: Never go below their goal line; never get sucked in whereby two of our F are low or attacking the same side. Key is to take away the other side of the ice and angle puck carrier up the wall and close them in where they have to dump it or try to thread the needle with a pass through the middle which we should pick off fairly easily.