Power Play and Penalty Kill
Description
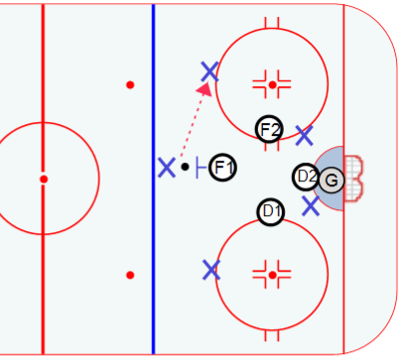
Diagram 1 Penalty Kill:
The standard set-up for the diamond is shown. Some teams play with middle defenders wider and higher but I like to keep a tighter grouping inside.
When the puck is at the top of the umbrella F1 comes out strong to pressure the puck carrier and force him to move the puck.
If the puck gets below top three players, the middle defenders grouped can step down and help in front of the net.
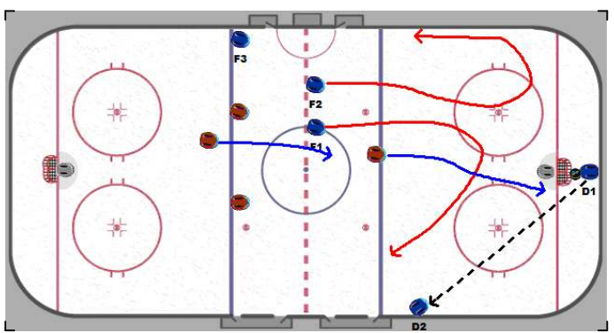
Diagram 2 Power Play:
This breakout will allow us to create odd man situations all the way down the ice if performed properly.
D1 goes behind the net to get the puck
D2 goes to the left side boards above the circle and below the blue line.
F3 holds at the wall of the offensive blue line.
F1 and F2 come back to receive passes off the breakout.
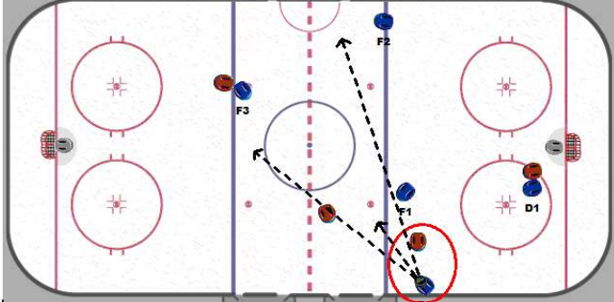
Diagram 3 PP:
D2 accepts pass along the wall. When the opponents second FC comes to D2 to force the play, D2 has three options for a pass.
1) Easy pass to F1 Cutting to the wall
2) Cross ice to F2
3) Up ice to F3 if the defense doesn't watch him.
Diagram 4 PP:
When the second FC came to D2 it creates a 3on 2 up ice if we skate hard.
Diagram 5 PP:
We enter the offensive zone with speed creating a 3 on 2 down low. If a quick pass to the middle isn't open we regroup and set up in our normal powerplay positioning.