Basic Neutral Zone Options

Description
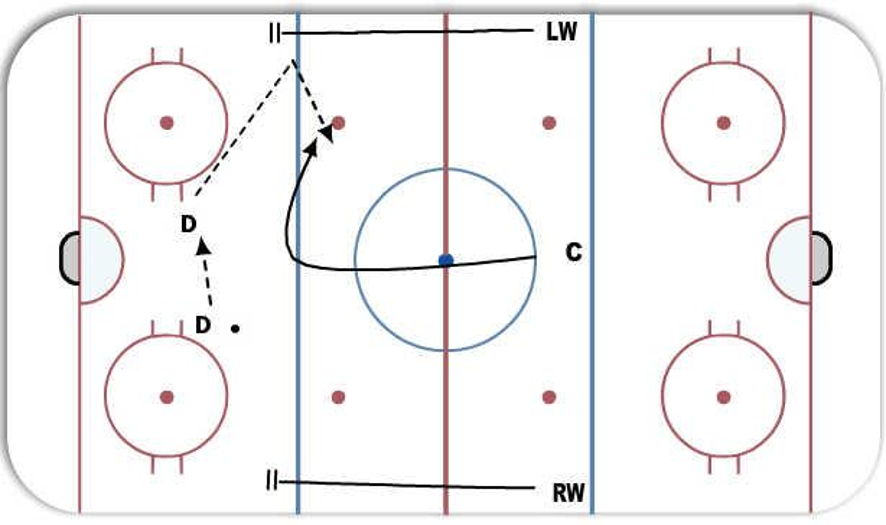
{DIAGRAM #1 - POST UP} LW and RW post up inside the blue lines, giving a deep outlet option. C curls strong-side for a secondary passing outlet.
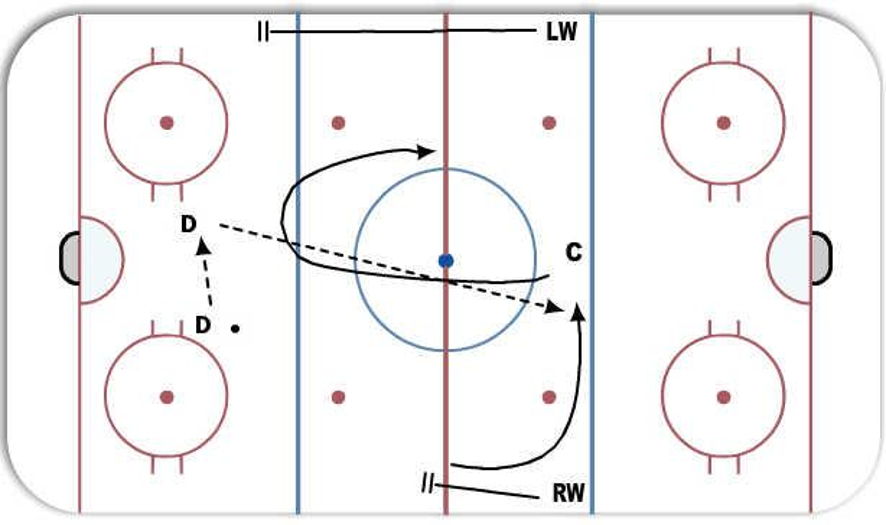
{DIAGRAM #2 - DOUBLE CURL} The strong-side forward (LW in the diagram) curls to the middle of the ice, C curls toward the boards. RW posts up for a deep weak-side outlet option.
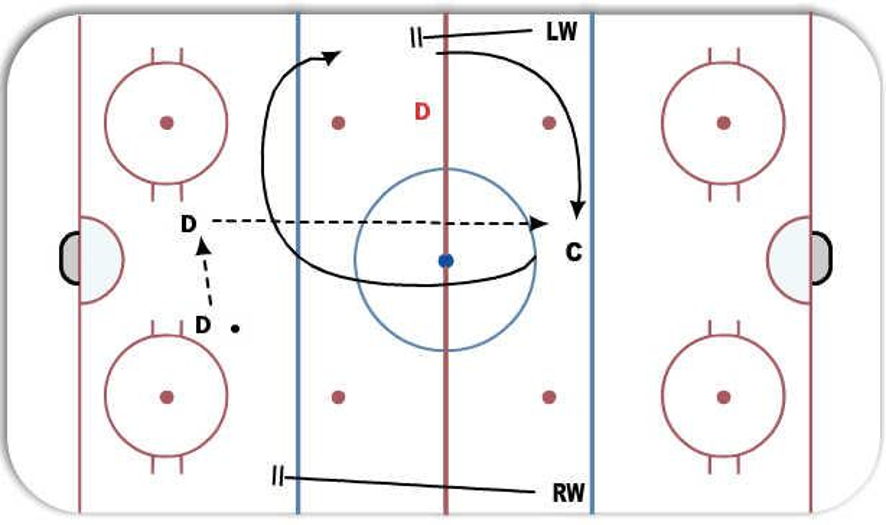
{DIAGRAM #3 - WEAK-SIDE STRETCH} Strong-side forward (LW in the diagram) posts up inside the blue line for a secondary deep option. C curls toward the strong-side wall. RW skates up and cuts back across the far blue line for a stretch option.
{DIAGRAM #4 - STRONG-SIDE STRETCH} The strong-side wing (LW) skates up, then cuts back across the far blue for a stretch option. C curls toward the strong-side boards. RW posts up inside the blue for a deep weak-side outlet option.
 |