1/2 Circle Shots, Point Shots, 2 one 1's

Description
1/2 Circle Shots, Point Shots, 2 one 1's
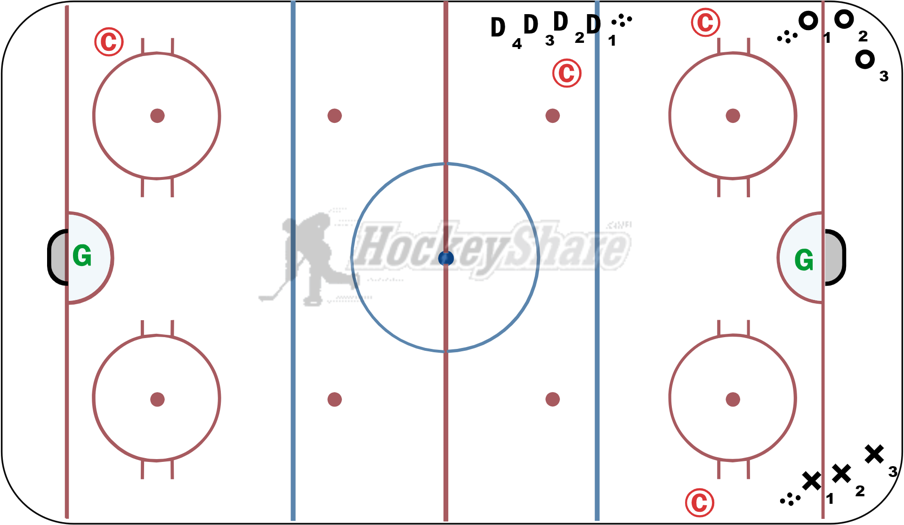
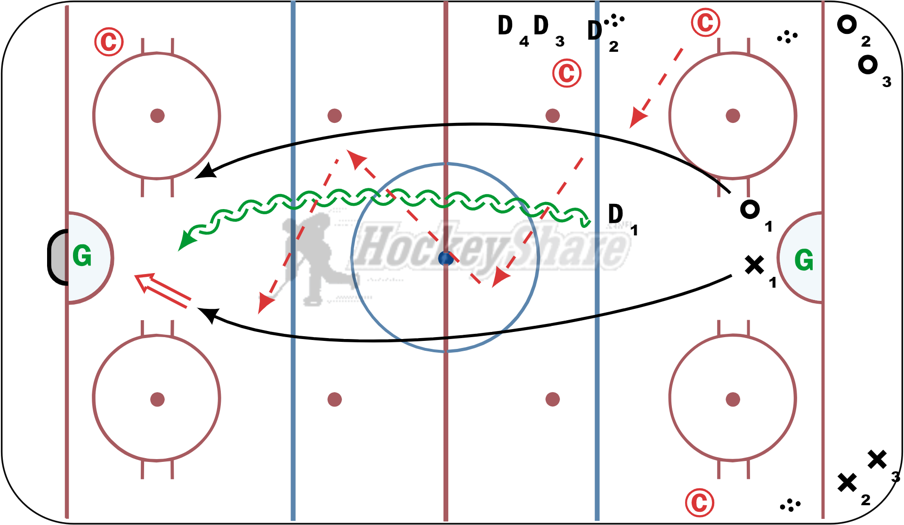
Notes: DIAGRAM ONE
Shows how everyone lines up to start. X and O represent forwards, D represents Defenseman and C represents Coaches
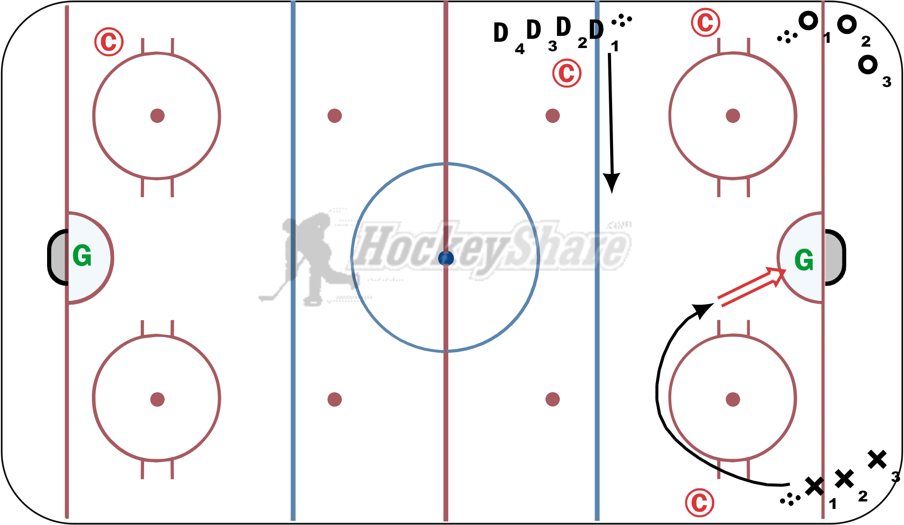
DIAGRAM TWO
On whistle:
X1 Skates with a puck around the half circle and shoots puck on the goalie from above the hash mark.
As X1 is shooting, D1 skates along blue line to mid-ice
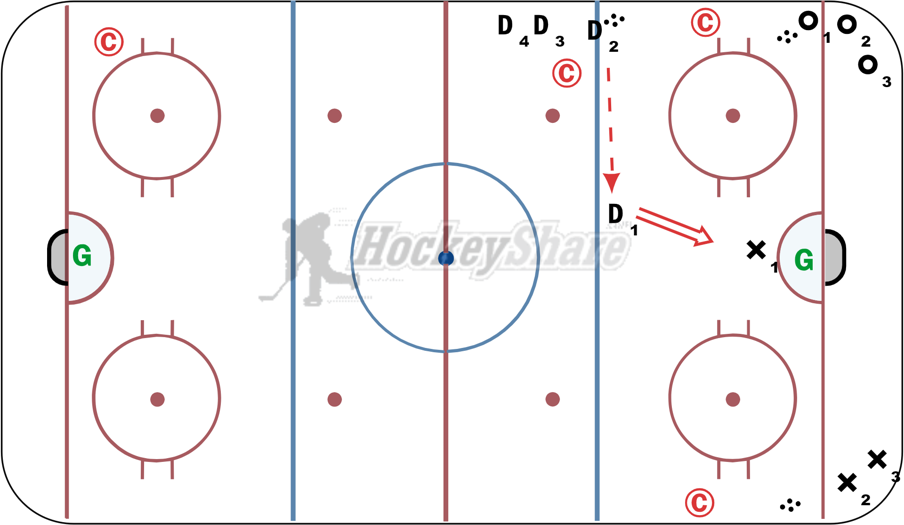
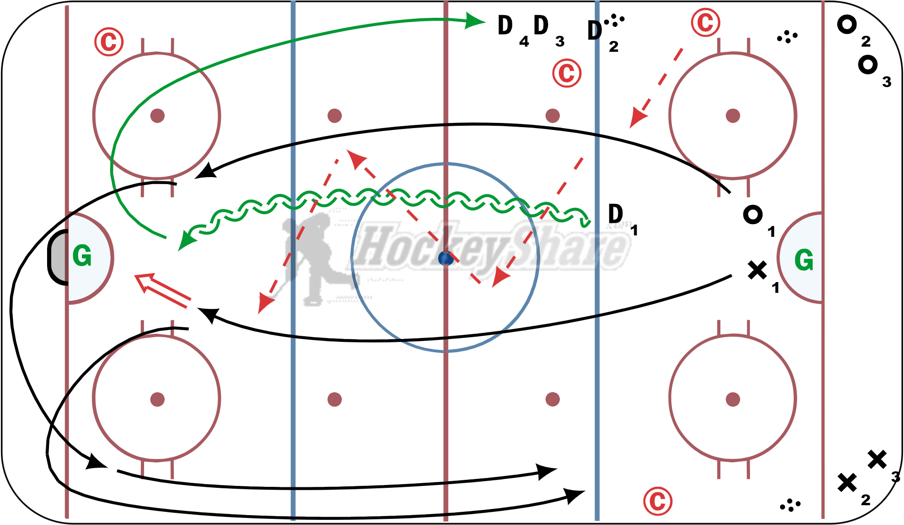
DIAGRAM THREE
After X1 has shot, they stand in front of goalie for screen/tip/rebound while D2 passes a puck to D1 to shoot on the goalie. Once saved or scored, Coach blows whistle
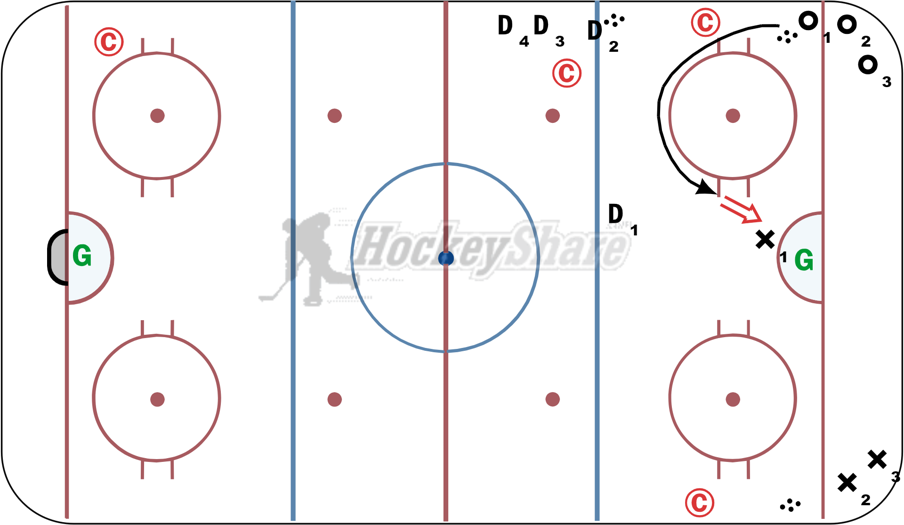
DIAGRAM FOUR
After whistle, O1 Skates with a puck around the half circle and shoots puck on the goalie from above the hash mark while X1 is in front of goalie for screen/tip/rebound. Once saved or scored, Coach blows whistle
DIAGRAM FIVE
After whistle, X1 and O1 stand in front of goalie for screen/tip/rebound while D2 passes a puck to D1 to shoot on the goalie. Once saved or scored, Coach blows whistle
DIAGRAM SIX
After whistle, X1 and O1 break out on 2 on 1 versus D1 while Coach hits O1 with a pass. They skate down ice passing and shooting, trying to score while D1 tries to stop them. Once saved, scored or puck is lost the drill is over for those three players.
DIAGRAM SEVEN
Once done, D1 skates back up their side of the ice to return in line.
X1 and O1 skate back to the other side of the ice along the boards (staying out of the way) and stop around the blue line, since the next three will have started the drill. Coach on that side of the ice will tell them when they can skate back in line.
NOTE: Once the X1, O1 and D1 or going down ice (cross the red line), X2 can start the drill again with O2 and D2 and D3.
 |