This drill is currently in the trash and scheduled to be deleted soon
Break In F123 Positioning
This drill was created using HockeyShare.com's Online Drill Drawing & Practice Planning Platform.
Description
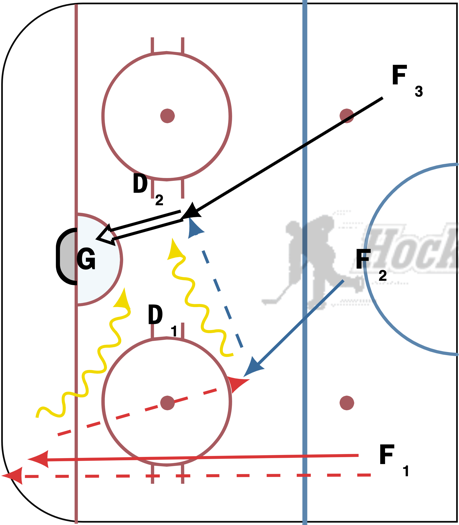
F1 Starts drill with sending puck to corner, chases it down. (F2 goes to high circle, F3 lingers in high zone ready to skate into slot)
F1 Passes to F2 (F3 skates towards high slot for pass)
F2 passes quickly to F3 for shot
F3 shoots
Yellow lines: F1 and F2 crash net for rebounds
D can play dumb at first, then when F get idea, have them play full D against the play
Run on other side to get both sides of ice
Category: Forwards
Posted By: Stucolorado
(Used in 2 Plans)
Created: 2022-10-29, Last Modified 2022-11-05
 |