Seam and Screen
This drill was created using HockeyShare.com's Online Drill Drawing & Practice Planning Platform.
Description
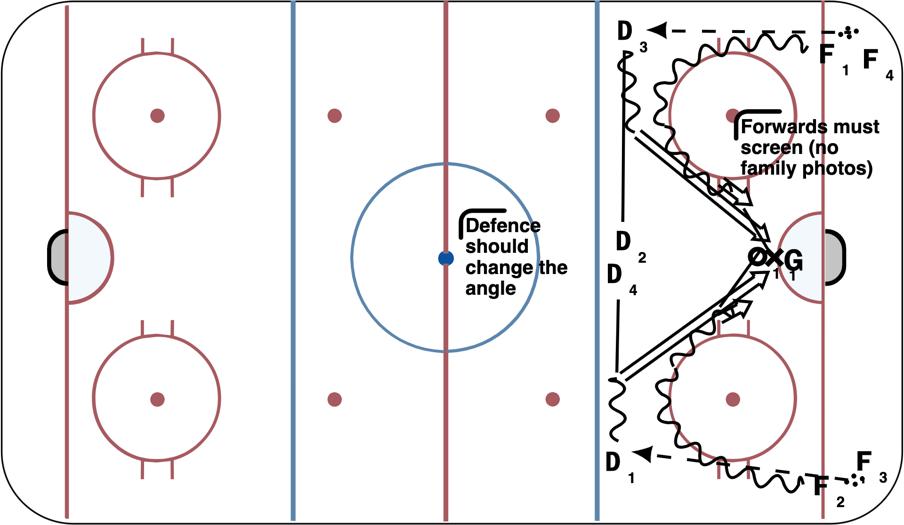
F1 starts with a puck and cuts the seam for a shot on the net. They stay in front of the net to screen for F2. F2 cuts the seam for a shot on the net. They stay in front of the net with F1. F3 makes a pass to D1. D1 moves to the middle of the ice and takes a shot with F1 and F2 screening. D2 keeps a gap with D1 and after the shot moves to the D3 position. Once D1 takes the shot they keep a gap with D3 and move to the D4 position. F4 makes a pass to D3. D3 moves to the middle of the ice and takes a shot with F1 and F2 screening.
A progression is that the defence has to make a D-to-D pass before a shot can be taken.
Notes: The forwards must screen and have a high/low screener (and not beside the goalie). The defence needs to be aware of the gap with their partner as they move into the supporting position.
 |