Free Ring - Offensive Zone
This drill was created using HockeyShare.com's Online Drill Drawing & Practice Planning Platform.
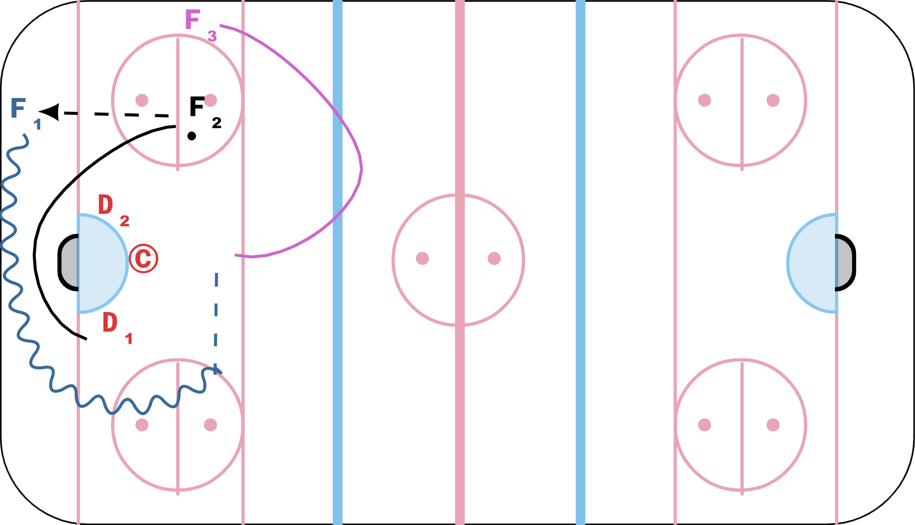
Description
F2 passes to F1 - then becomes the "trailer" - follows her pass then times her skate behind the net to gain advantage while remaining below the goal line. (F2 should always position herself below the goal line either by timing her skate so she is in the position (slow to hide behind the net / delay or stop in the near the corner (1.0- 1.5 meters off the boards) to receive a quick pass back from F1 if she is a viable option. If F2 slides above the goal line, she diminishes her advantage)
F1 Receives the pass & initiates the long side attack behind the net and up the boards cutting the edge of the circle to allow the “outside board lane” to develop.(F1’s skates should cut the outside of the circle which allows her to create a board side lane for F3 to utilize.)
F3 - Enters the offensive zone then exits. Re-entry must be timed so that she is able to receive a flat pass inside the ringette line for a quick shot or drive to the net.is timed for when F1 is cutting the edge of the circle. (F3’s role is gauge and observe the attack of F1 and F2 develop and how the triangle moves.)
 |