Power Play - Break-out
This drill was created using HockeyShare.com's Online Drill Drawing & Practice Planning Platform.
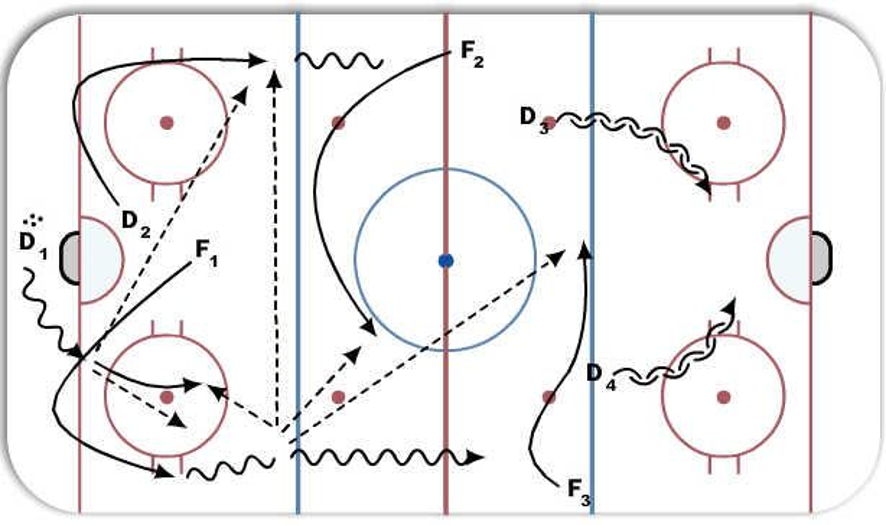
Description
D1= has puck behind the net. steps out with D2/F1 curling low.D1 has the option to make a pass to F1 or D2 curling low.
D2/F1= Curl low in zone to give a clear passing option for D1 stepping out from back of net with the puck.
F2= Curls low in neutral zone and presents a passing option
F3= Skates along opposing blue line in order to create neutral zone space and a passing option (Keeps D back!!)
D2/F1= have 5 options:
1. Pass to low curling F2 in the NZ.
2. Cross ice pass to D2 (Must be hard and confident!!!)
3. Skate puck into the zone.
4. Drop back to D1 starting the play.
5. Stretch pass / break away pass to F3.
Key points:
-Timing is everything
-Initiate uniform break-out
-Accurate passes (Tape to Tape!!!)
 |