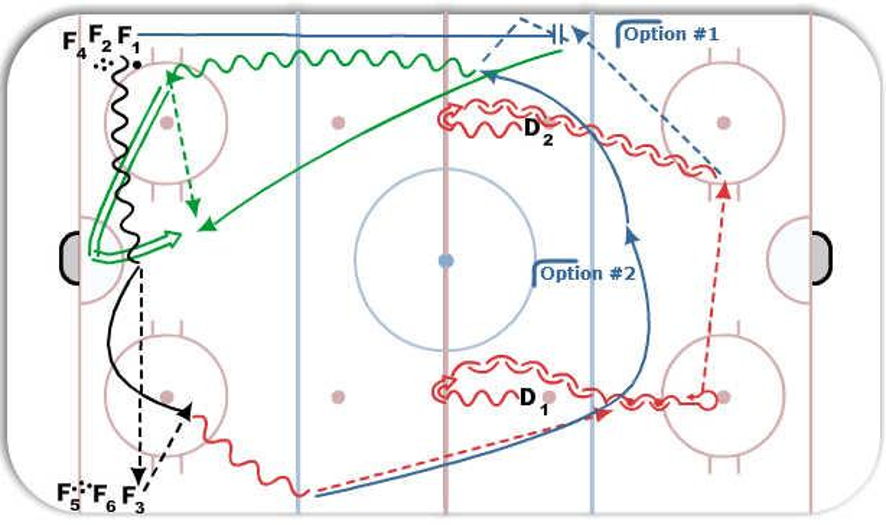
Neutral zone breakout

This drill was created using HockeyShare.com's Online Drill Drawing & Practice Planning Platform.
Description
Drill starts with both D on approx face off dots. On whistle both D do a quick F to B transition skate. F1 breaks across ice and passes to F3. F1 hgets return pass from F3 and breaks out of zone. Once F1 receives pass F2 then skates hard to support the weak side. F1 passes to D1 (after transition) and then supports the puck through the neutral zone (always behind the puck). F2 skates hard and posts up support along the wall. Once D1 swings puck to D2 the D2 passes to F2 along the wall. F2 can make a direct pass or a chip pass to F1. F1 and F2 go down 2 on 0. F1 can take shot off pad to F2 or direct pass or escape with a pass. This drill can be done both sides at the same time very easily. PROGRESSION: Add the F3 and run a double swing with a lane change.
