This drill is currently in the trash and scheduled to be deleted soon
Drop Pass & Back Pass
Description
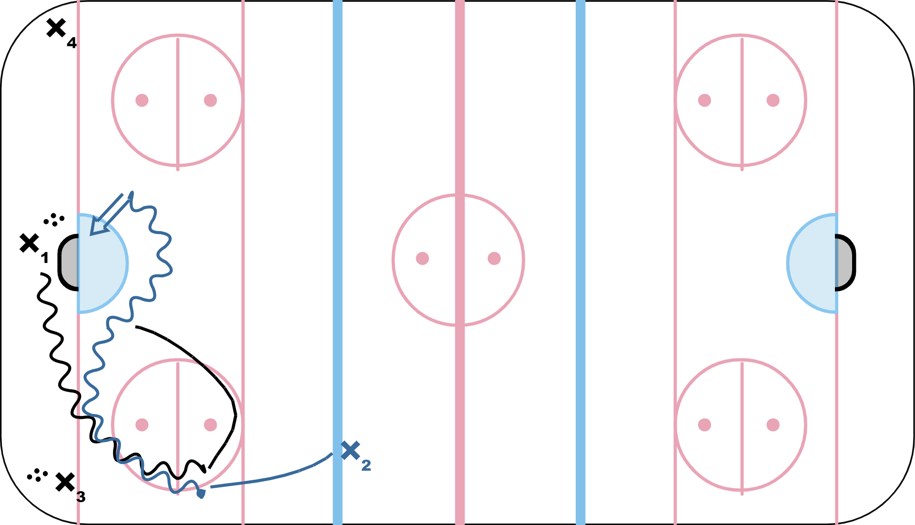
X1 Sets up behind the net with rings, X2 sets up outside the blue line
X3 Sets up in one corner with the rings, X4 sets up outside the other corner
X1 leaves the area behind the net with the ring, and sets a drop pass for X2. Drop pass should happen around the hash marks or above.
X2 drives the net for a low walk, X2 provides the option for a back pass or is there for a rebound
After the shot, X3 leaves the corner with the ring to set up for a drop pass with X4. After receiving the pass, X3 takes a shot with X4 going for the rebound.
Key Points
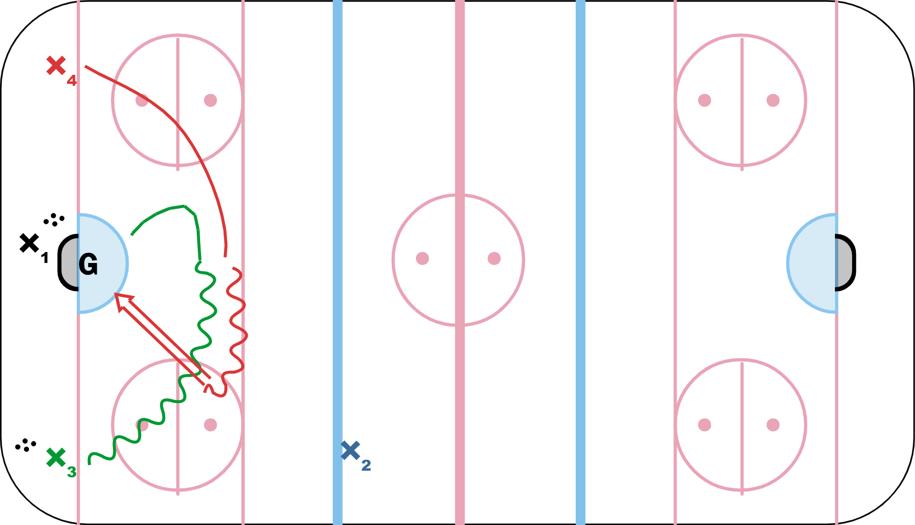
- can be done with drop pass, back pass or fake pass
- conversation - what pass should be used based on if the player is on forehand vs backhand
Category: Passing
Posted By: agallace
(Used in 2 Plans)
Created: 2023-11-29, Last Modified 2023-11-29
 |