Dig / Around the zone / Shoot
This drill was created using HockeyShare.com's Online Drill Drawing & Practice Planning Platform.
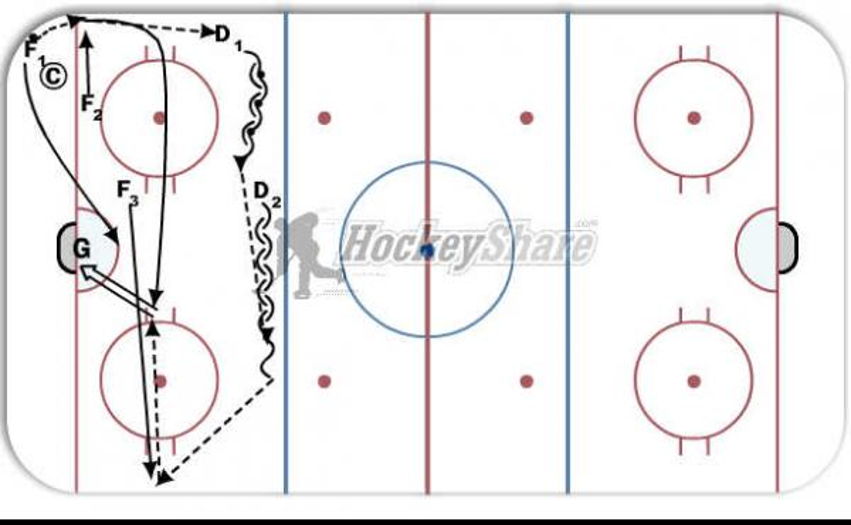
Description
Initial Positions:
- F1 in corner with puck and Coach checking.
- F2 in Support position about 5 ft away.
- F3 just inside of hashmarks on puck side.
- D1 pinching in to top of circles.
- D2 back at blue line just on puck side of centre.
Actions:
(COACH WILL FOLLOW THE PUCK ALWAYS)
- F1 kicks puck up boards.
- F2 digs puck off of boards and passes to D1.
- D1 moves laterally at back towards blue line while F1 heads to the net for a screen or deflection and F2 moves higher towards the blue line for a possible pass and D2 moves away from D1 for a D to D pass.
- D1 passess to D2 and F3 heads to the boards for a pass while F2 takes up position on the hashmarks on the puck side.
- D2 passes to F3.
- F3 pasess to F2 who either shoots or passes to F1 to shoot in.
F1 becomes F2, F2 becomes F3, F3 becomes D1, D1 becomes D2 and D2 becomes F1.
 |