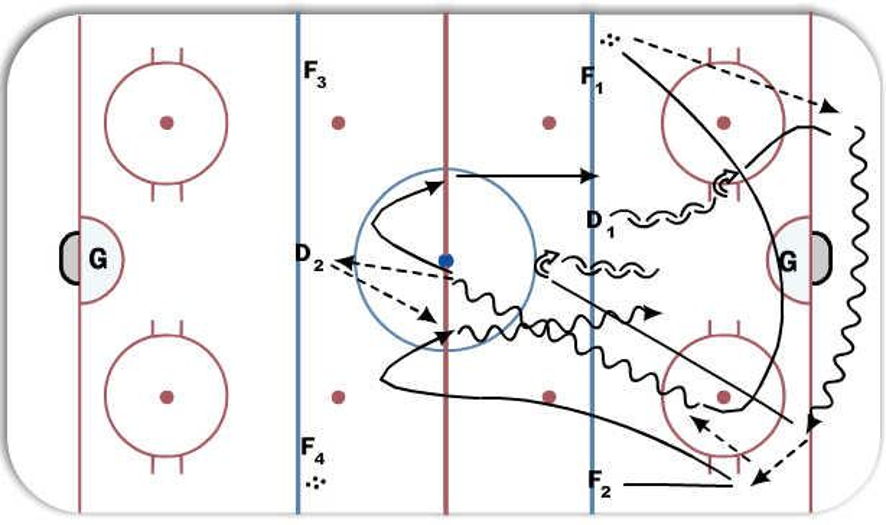
Breakout/Regroup to 2-1

This drill was created using HockeyShare.com's Online Drill Drawing & Practice Planning Platform.
Description
Start with two F (F1 and F2) and a D (D1) along the blueline. F1 dumps puck in corner. D1 goes back gets puck and wheels around the net. F2 gets in position along boards and receives breakout pass from D. F1 executes center support loop and receives pass from F2. F1 carries to center and passes to D2 for regroup. F1 comes out of zone and both F1 and F2 loop to give options to D2. D2 passes to one of F1 or F2. Meanwhile D1 skates to center circle executes pivot and then plays a 2 on 1 with F1 and F2.
As soon as D2 executes regroup pass F4 dumps puck in opposite end to loop the drill. Position new D and F where D1, F1 and F2 were positioned.
