Power Play Breakout
This drill was created using HockeyShare.com's Online Drill Drawing & Practice Planning Platform.
Description
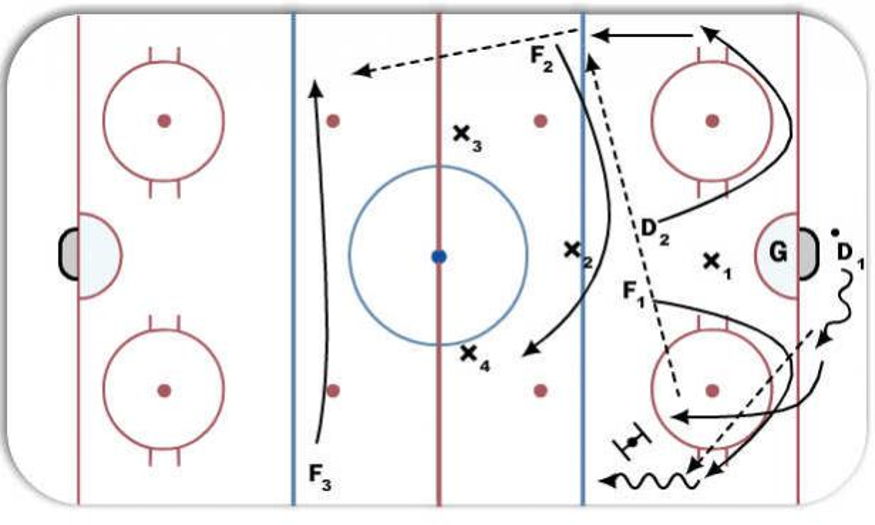
D1 sets up behind our own net. with the puck.
F2 is positioned just outside of the defensive zone, just outside the blue line.
F3 is positioned just outside of the offensive zone on the opposite side of the ice.
F1 and D2 prepare to present themselves for a breakout pass in the defensive zone.
F1 and D2 must swing low and deep into the zone and curl toward the boards, presenting themselves as options. In this instance, D1 takes a few strides and passes to F1. D1 should then follow-up his pass, slightly offset from F1. In case X1 pressures F1, F1 can do a drop pass to D1.
D1 can immediately fire a pass cross-ice to D2.
In the meantime, F2 and F3 are swinging through the middle of the neutral zone as shown.
D2 can then head man the puck to F3.
Notes: Unless F3 has a breakaway, gain control of the zone and set-up the power play. Anything other than a 2-on-1 or 3-on-1, we should gain control of the zone and set-up the power play.
 |