Dartmouth 1 vs 2
This drill was created using HockeyShare.com's Online Drill Drawing & Practice Planning Platform.
Description
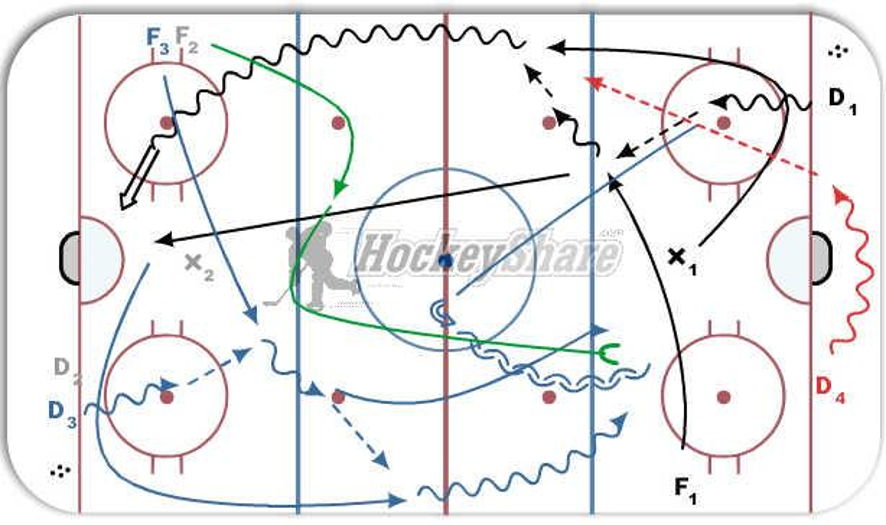
Drill is shown from one end only.
To start:
(BLACK) X1 swings, F1 slash skates across ice getting pass from D1. F1 passes to X1 and backchecks. D1 follows.
X2, F2, and D2 perform drill other way at the same time (optional)
(BLUE)
F1 swings, moves up boards.
F3 cuts across ice getting pass from D3.
F3 passes to F1 and backchecks.
F1 attacks D1 0ne on one with F3 giving back pressure.
Notes: F's: Break-out, Backcheck, Swing, Attack.
D's: Break-out, Follow attack, Defend.
Variations:
1. 2 vs 1...F3 joins F1 in attacking D1.
2. 2 vs 2...F2 skates pattern shown (in GREEN), backchecks F3. Backchecker becomes the swingman and attacker.
3. (RED) D wheels behind net.
 |