This drill is currently in the trash and scheduled to be deleted soon
Power Play Breakout
This drill was created using HockeyShare.com's Online Drill Drawing & Practice Planning Platform.
Description
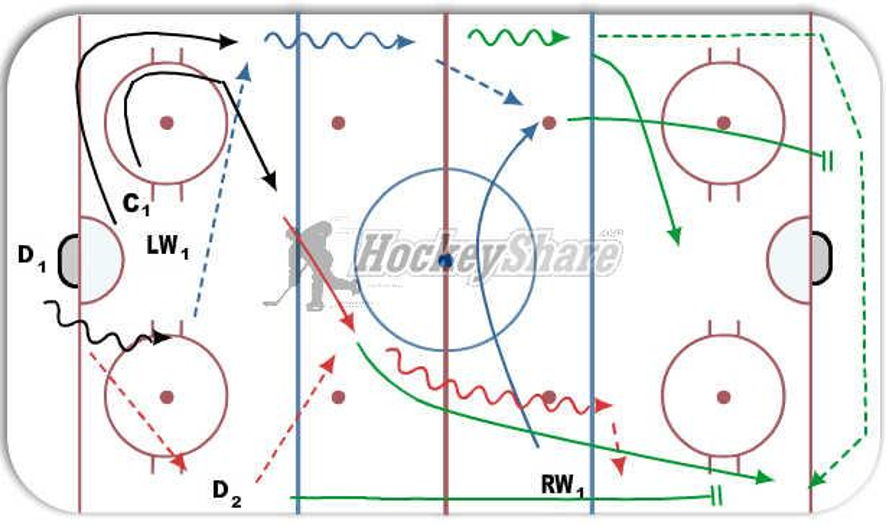
First Pass...D1 to D2 (RED)
--Second Play...D2 passes to C in middle.
-----Third Play...C drops for anchored RW
--Second Play ...D2 passes to RW
----Third Play...RW chips or touch back to C. Not Shown
First Pass...D1 to LW (BLUE)
--Second Play...LW passes up to RW.
...LW carries puck into zone unchallenged.
...LW rings for C and RD (GREEN)
Category: Systems
Posted By: puckmom
(Used in 0 Plans)
Created: 2014-05-19, Last Modified 2014-05-19
 |