Dunbar Breakout
This drill was created using HockeyShare.com's Online Drill Drawing & Practice Planning Platform.
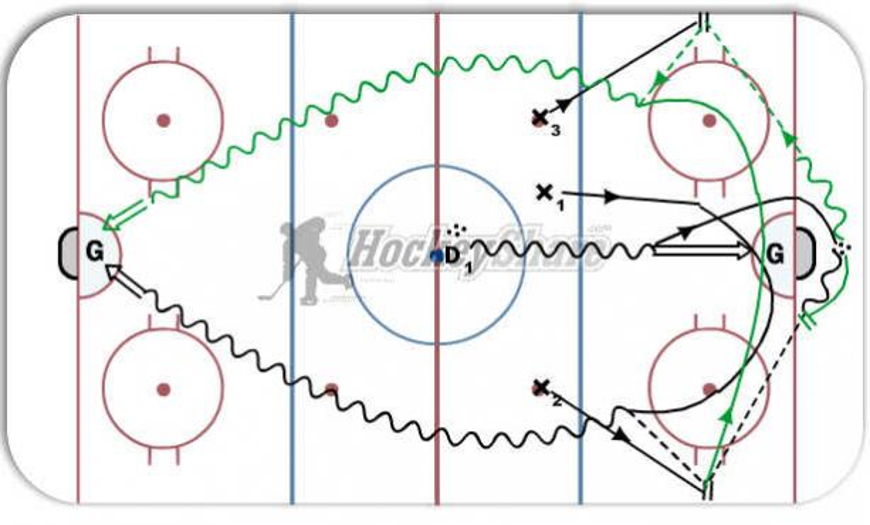
Description
Drill starts with line of forwards across blue line and defenceman at bottom of centre faceoff circle w/puck. Defenceman goes in for a shot on goal with wings taking position at hashmarks and centerman(X1) folowing shot in for support. Defenceman goes behind net, and picks up a puck and comes out to make the first breakout pass to the winger(X2).X2 makes a one touch pass to X1 who has read the play and supported the pass.X1 takes the puck the length of the ice and shoots on goal.
X2 then supports the defencemen who reverses direction behind the net & picks up another puck and passes to the far winger(X3) at the hashmarks.X3 one touch passes to X2 who skates the length of the ice for a shot on goal.
X3 goes to X1 line for next sequence.
Notes: As a progression, have all three forwrds leave zone as a 3 on 0 and set up triangle offense in offensive zone.
Have Defenceman stop and reverse direction behind net,to force support man to react.
 |