This drill is currently in the trash and scheduled to be deleted soon
Power Play Breakout
This drill was created using HockeyShare.com's Online Drill Drawing & Practice Planning Platform.
Description
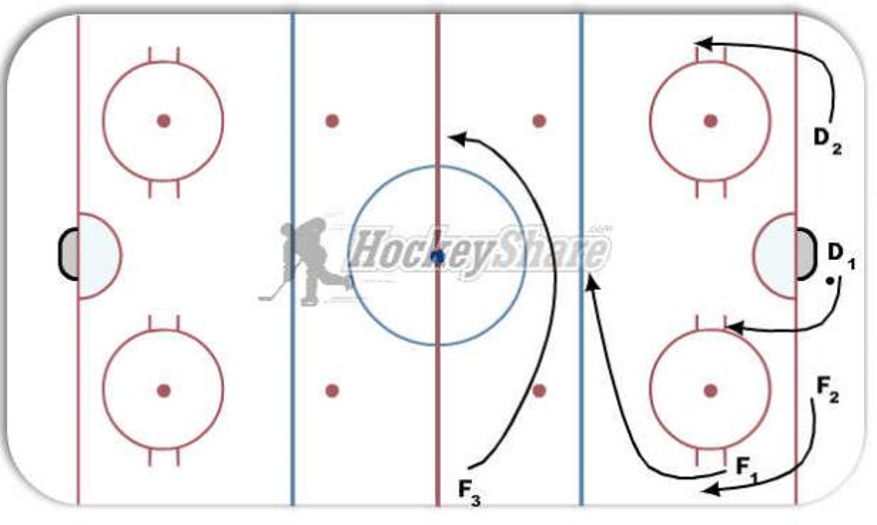
D2 will swing to one side and F1 and F2 will swing to the other. Timing and Spacing is key.
F3 will cut across finding open ice and becoming a option through the neutral zone.
D1 will come from behind the ice and move up ice, when he gets pressure from the forechecker he can move the puck to F2, F1, or D2.
We would like to carry the puck into the zone to maintain possession Only Dump the puck if needed.
Category: Systems
Posted By: BDstars04
(Used in 1 Plan)
Created: 2011-11-09, Last Modified 2013-06-03
 |