This drill is currently in the trash and scheduled to be deleted soon
Neutral Zone Regroup
This drill was created using HockeyShare.com's Online Drill Drawing & Practice Planning Platform.
Description
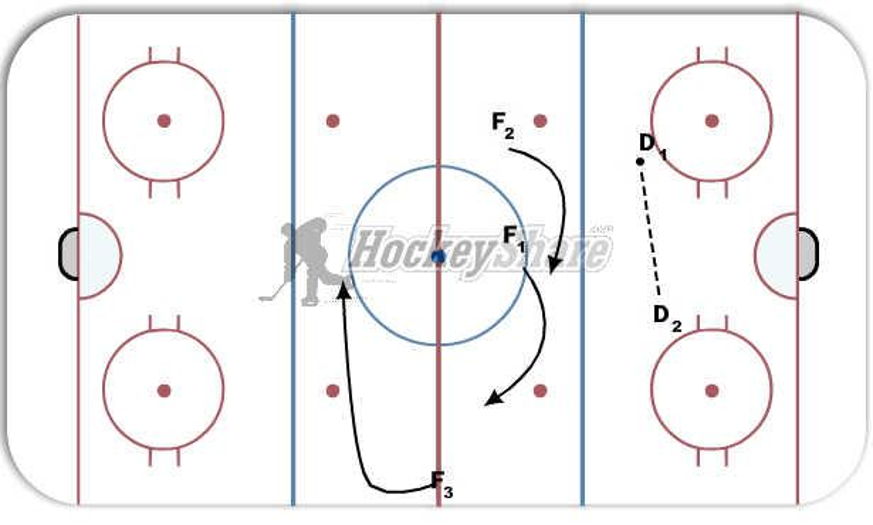
D1 and D2 Will Make a D to D Pass.
F1 and F2 will both swing through the middle. Spacing is key and F1 and F2 cannot get too close.
F3 is on the weak side and goes up and across to stretch the ice.
If D1 passes to D2 and then back to D1. F1 has to read this and swing throgh the middle again in support.
Category: Systems
Posted By: BDstars04
(Used in 1 Plan)
Created: 2011-11-10, Last Modified 2013-06-03
 |