This drill is currently in the trash and scheduled to be deleted soon
Outlet Passing
This drill was created using HockeyShare.com's Online Drill Drawing & Practice Planning Platform.
Description
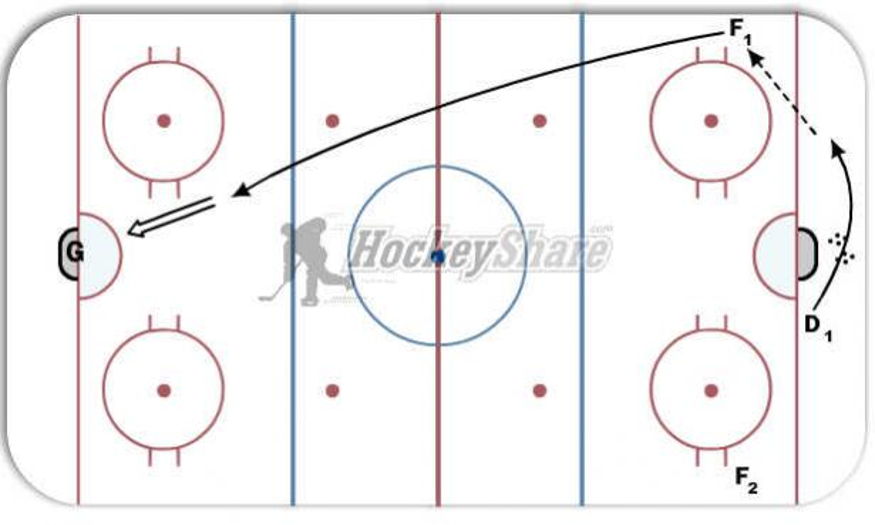
- D1 starts behind the net
- F1 and F2 start at hash marks
- D1 skates and picks up the puck and makes pass to F1 (F1 starts to move up the ice as D1 is picking up the puck)
- F1 skate up the ice and takes shot on net
- D1 stops goes back behind net picks up another puck and makes pass to F2 (F2 moves up the ice as D1 picks up puck)
- F2 skates up the ice and takes shot on net
- D1 stops and picks up another puck and skates up the ice for a shot on net.
Notes: add pylon at blue line and have F1 and F2 chip the puck off the boards
Category: Passing
Tags: Defense making pass well moving, getting forwards to move up well the play is happening
Posted By: Hoofter
(Used in 0 Plans)
Created: 2011-11-22, Last Modified 2013-06-03
 |