This drill is currently in the trash and scheduled to be deleted soon
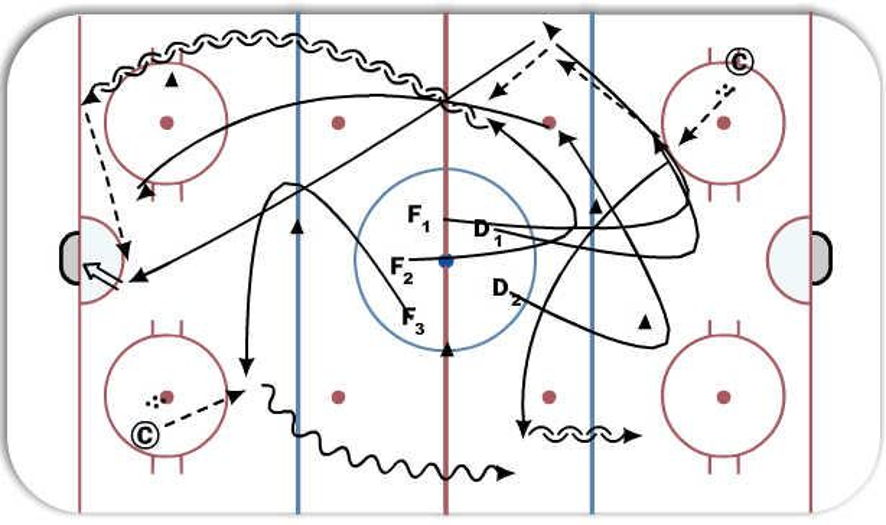
4 Cone Neutral zone (2v1 &1v1)
This drill was created using HockeyShare.com's Online Drill Drawing & Practice Planning Platform.
Description
D1 gets puck and passes to F1, F1 and F2 go on a 2v0 with D2 backchecking (D2 has to go around cones
(F1 goes around cone and F2 goes above cone with timing)
F3 goes around cone and gets a pass from coach then goes down 1on1 vs D1.
Category: Competitive
Posted By: barry@*********
(Used in 1 Plan)
Created: 2015-02-07, Last Modified 2015-02-07
 |