This drill is currently in the trash and scheduled to be deleted soon
Screen Shot 2 on 1
Description
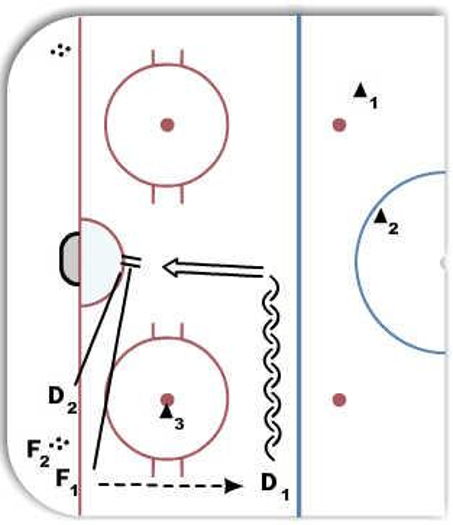
Diagram 1:
-F1 passes to D1 @ the blue line
-D1 skates to the middle of the ice and takes a shot while F1 skates to the front of the net for a screen/tip. D2 will work to move F1 from the front of the net
-F1 and D2 will battle for the puck until the coach blows the whistle
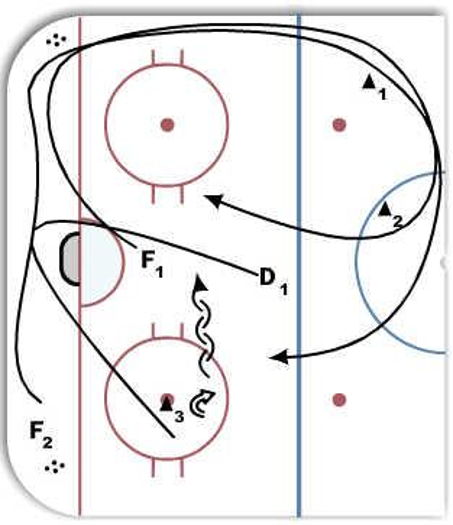
Diagram 2:
-On the coach's whistle, F2 will race to opposite corner, pick up a puck, make a cycle pass to F1 who has followed up, then F2 skate up around pylons 1&2 wide and drives the net or stays high in slot, while F1 takes a tight path around pylons 1&2 and drives the net with the puck
-On the coach's whistle, D1 will race behind the net and pivot around pylon 3 to stop F1&2 from driving the net
Category: Competitive
Posted By: riotingrevel
(Used in 3 Plans)
Created: 2015-03-13, Last Modified 2015-03-13
 |