Defend Behind the Net
This drill was created using HockeyShare.com's Online Drill Drawing & Practice Planning Platform.
Description
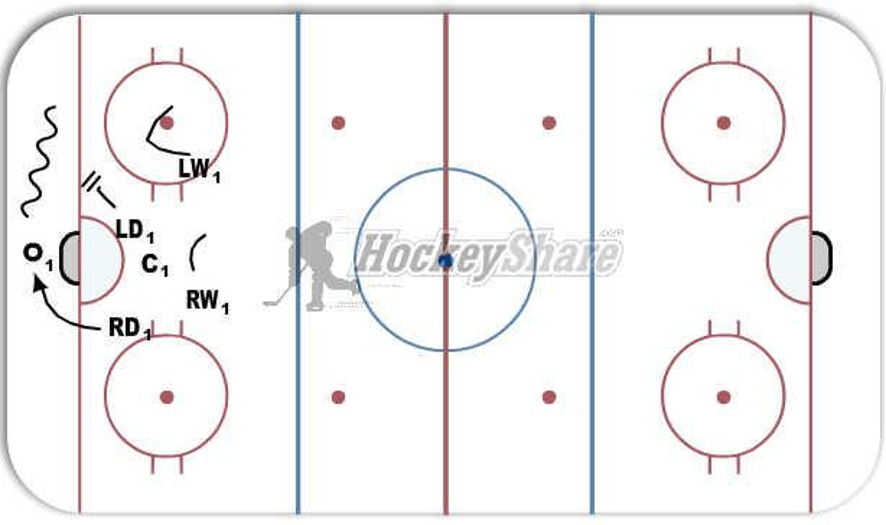
- o1 will start with puck behind the net. He will have two teammates to help out offensively, coaches playing offensive defensemen. Let play happen until obvious whistle. Go from left and right sides, switch personnel.
IF RIGHT HANDED SHOT: RD1 will pursue o1, LD will move to goal line and take away passes, C will cover the front of the net. LW1 will move down low, RW1 will move into high slot. Once o1 has been flushed into corner, LD will pursue, RD will cover front of the net, C will move to bottom of near circle, LW will cover point and RW will stay in high slot.
IF LEFT HANDED SHOT: LD1 will pursue o1, RD will move to goal line and take away passes, C will cover the front of the net. RW1 will move down low, LW1 will move into high slot. Once o1 has been flushed into corner, RD will pursue, LD will cover front of the net, C will move to bottom of near circle, RW will cover point and LW will stay in high slot.
 |