This drill is currently in the trash and scheduled to be deleted soon
brake out crash the net
This drill was created using HockeyShare.com's Online Drill Drawing & Practice Planning Platform.
Description
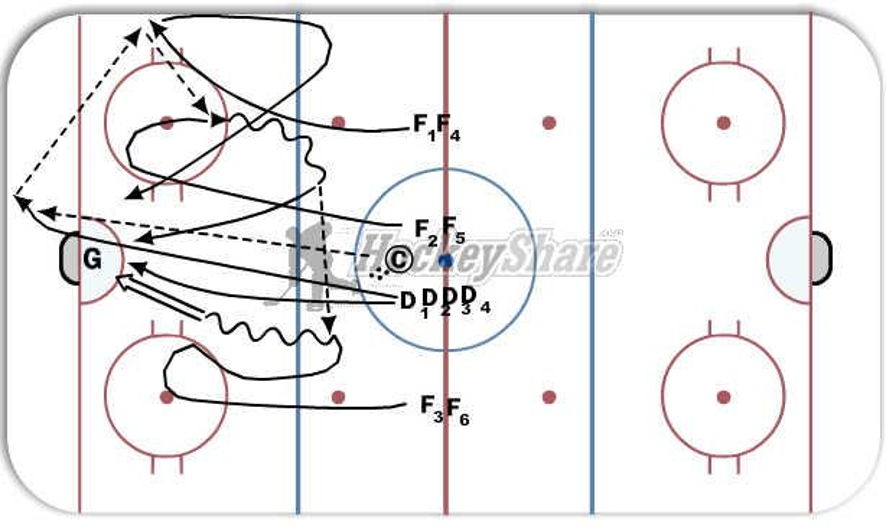
Coach dumps the puck into the zone.(any where you want)D1 and D2 go into the zone D1 on the puck D2 out in front of the net. F1 goes to the boards while F2 and F3 go in and curl to come back out. D1 pickes up the puck and passes to F1. F1 then passes to F2. F2 cares the puck out of the zone. F1 and F3 come out of the zone with F2. Once out of the zone F2 makes a pass to F3. F3 cares the puck back into the zone. F1 and F2 crash the net with F3. D1 and D2 come back up as the forwards leave the zone and play defence as the forwards brack back in
Notes: make sure fowards are creating a triangle as they brake back in to the zone
Category: Small Game
Tags: brake out of the zone, crash the net
Posted By: Dwight Westbrook
(Used in 3 Plans)
Created: 2012-08-13, Last Modified 2013-06-03
 |