Battalion Breakout - Advanced
This drill was created using HockeyShare.com's Online Drill Drawing & Practice Planning Platform.
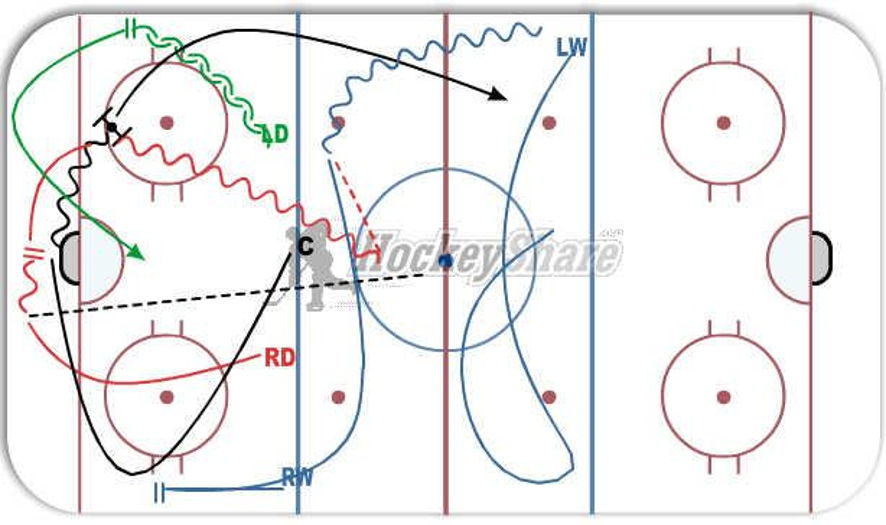
Description
Puck gets dumped in and RD picks up puck and stops behind net.
C swings down and picks puck up and draws first forechecker to him, then drops puck back to RD. C also has option of making quick pass to LW if open straight up the middle.
While this is happening, LD has posted up on left hash marks, and RW has done the same on right side. LW swings back and forth between red and far blue looking for opening.
D skates up the middle with the puck waiting for opposition to close in or collapse. At that point RW comes swinging behind RD for a sideway drop pass at full speed. The drop pass is intended to freeze the opposition.
RW now can either carry the puck into the zone or fire it down deep as LW and C are skating at full speed into the zone.
Notes: This breakout is particularly effective against teams who like to "sit back" or plays trap in the neutral zone.
It also relies heavily on player picking up drop pass from RD to gain speed and have puck control to enter zone at full speed.
 |