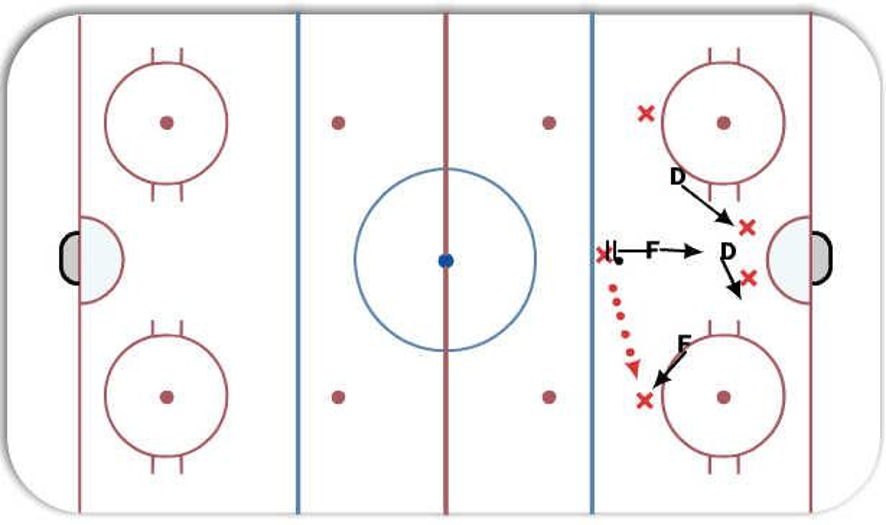
PK D-Zone Defending the Umbrella PP Formation
This drill was created using HockeyShare.com's Online Drill Drawing & Practice Planning Platform.
Description
Assuming the Puck is at the top of the umbrella.
F1 at top of diamond - Body in shooting lane, stick in passing lane. Aggressively forcing a pass to 1 side or the other. We do not want the player at the top of the umbrella shooting. When puck moves go back to the middle of the ice with stick in passing lanes.
F2 - If pass goes to strong side close on shooter with body in shooting lane and stick in most dangerous passing lane to the inside. If pass goes to weak side rotate down to cover dangerous man in front of the net.
D1 - If pass goes to strong side close on shooter with body in shooting lane and stick in most dangerous passing lane to the inside. If pass goes to weak side rotate down to cover dangerous man in front of the net.
D2 - Box out player in front of net on the strong side.
** if there is a shot on net everyone will collapse to the front of the net.
Notes: Keep puck out of the hands of the player at the top of the umbrella.
Weak side player at the side of the umbrella must cheat down to prevent a 2 on 1 in front of the net.
Our goal is to force a pass down low where one of the players in front of the net has to release to be an outlet. Thus putting us in a position that we are most prepared to defend.
 |