This drill is currently in the trash and scheduled to be deleted soon
D2D Support Drill in D-Zone (2 drills)
This drill was created using HockeyShare.com's Online Drill Drawing & Practice Planning Platform.
Description
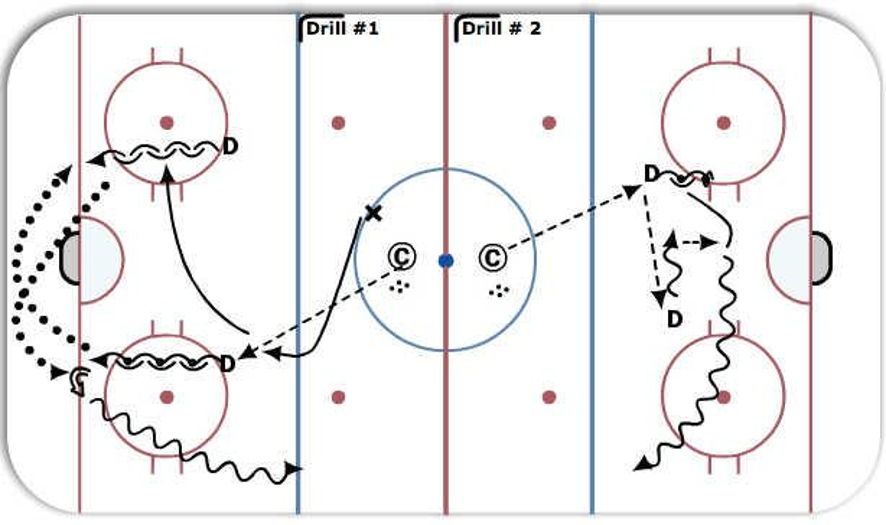
Drill # 1
D start at top of circle, Coach Passes to 1 of the D.
D1 w/ puck Skates backwards with and makes a pass D2D behind the net. He then goes back to support.
D2 w/o puck skates back to support his partner. He then makes a pass back to his partner.
D1 then escapes and skates the puck out of the zone.
X provides token pressure.
Drill # 2
D start at top of circles, Coach passes to 1 of the D.
D1 with puck passes D2D across to D2 who then crosses towards D1.
D1 drops behind for support and receives a drop pass and skates out of the zone
**X can put token pressure
***D can also move puck back and forth a few times and then switch out.
Category: Puck Control
Tags: Both Drills are designed to teach D to support the puck., Communication is important
Posted By: barry@*********
(Used in 0 Plans)
Created: 2015-09-10, Last Modified 2015-09-10
 |