Around the Horn - Part 2
This drill was created using HockeyShare.com's Online Drill Drawing & Practice Planning Platform.
Description
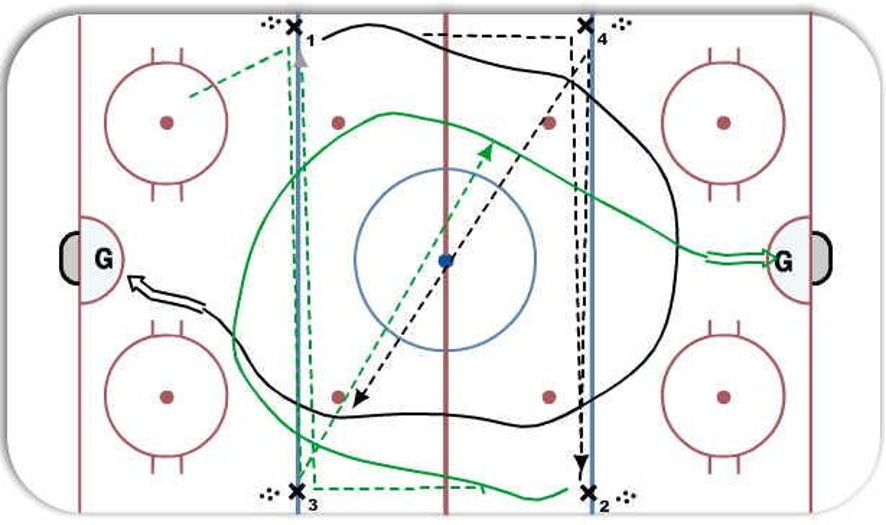
Lines of players again at X1, X2, X3, and X4.
X1 and X2 go first. X1 will pass to X4 (X2 to X3) and skate into opposite end zone, curling out on the opposite side. X4 will fire a cross-ice pass to next player at X2 (and X3 to X1), who will return it back to X4 (and X3). By this time, X1 (and X2) are leaving the end zone and providing a passing target for X4 (and X3). X4 will throw a long stretch pass cross-ice to X1 (and X3 to X2) to the player on the fly who will continue in and shoot.
CONTINUOUS FLOW: After original X1 and X2 players are clear, the coach will whistle, signalling X3 (and X4) to start the drill the opposite direction, passing to X2 (and X1), etc.
Notes: At younger ages, coaches may want to be inside the zone and if the long stretch passes miss, they can set the player up with a puck to go in and shoot.
At older age levels, coaches can play a 1-on-1 in the zone, forcing puck carriers to put a move on them before shooting on net.
 |